


7.17. Creating a service failure notification
Using the service notification wizard it is easily possible to monitor services on the local or a remote computer using IDERI note. If a service failure notification (or just “service notification”, for short) is applied to a service on a computer, an IDERI note message is created if the service fails, i.e. if it terminates unexpectedly because of a program crash. Using this feature of IDERI note is only possible in a domain environment. With the help of a wizard you can specify the service and the computer, where a service notification is applied to, as well as the message text, settings and options. If the wizard is finished, the IDERI note administrator will use the information that is collected during the course of the wizard and perform the following steps:
Add the AD computer account of the computer where the selected service runs (the target computer) to those principals that are allowed to create IDERI note messages
Install the IDERI note command line tools package on the target computer
Configure the IDERI note command line tools with an appropriate command line as a recovery option of the selected service on the target computer
Optionally create a scheduled task on the target computer, if the principal of the selected service does not authenticate as the AD computer account. This scheduled task is then triggered by the IDERI note command line tools if the service fails.
The service notification wizard is started from the “Service Notification” panel of the ribbon’s “Settings” tab in IDERI note administrator via the button labeled “Add a service notification”. The start page of the wizard looks like figure 7.68.
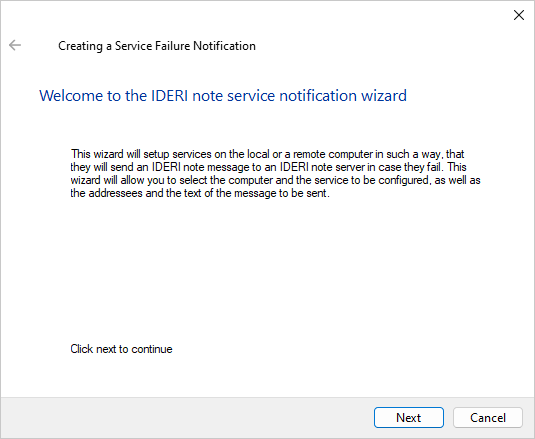
Fig. 7.68 Start page of the service notification wizard
Note that on Windows® Vista, Windows® Server 2008 and later operating system versions, the wizard pages will look slightly different than on the older Windows® operating system versions, albeit with the same content. On these newer operating system versions, the wizard will use the new AERO wizard design, whereas on the older operating system versions the Wizard 97 design will be used. If you click the “Next” button on the wizard’s start page, the second page will appear. The second page is shown in figure 7.69.
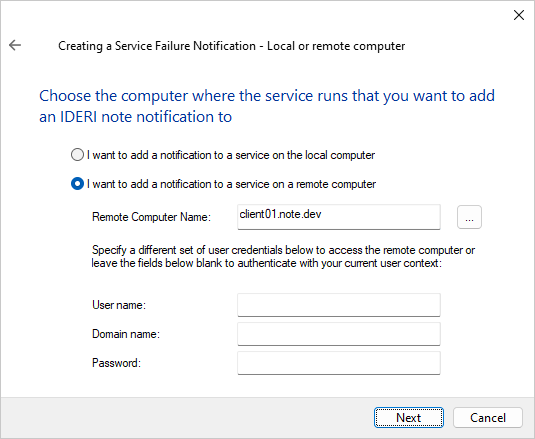
Fig. 7.69 Second page of the service notification wizard
On this page you can specify whether the service notification should be applied to a service on the local computer or to a service on a remote computer. If you specify the local computer, you have to run IDERI note administrator as a local administrator. On Windows® Vista, Windows® Server 2008 and later operating system versions you have to run IDERI note administrator in this case as an elevated administrator. However, if you specify a remote computer, you have to run IDERI note administrator as a user who is a member of the local administrators group of the remote computer. If you are not currently running IDERI note administrator as a member of the local administrator’s group of the remote computer, you can supply alternate credentials of a privileged user on this page. The wizard will then use these credentials to perform the necessary operations on the target computer. If you now click the “Next” button on this wizard page, the services on the target computer will be enumerated and the service selections page will appear. The service selections page is shown in figure 7.70.
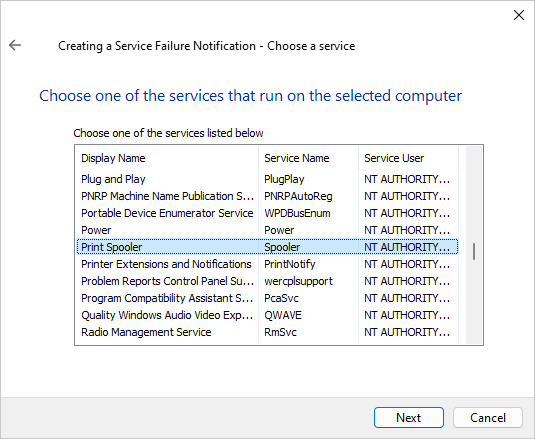
Fig. 7.70 Service selection page of the service notification wizard
On this page you will see a list of all services that are currently configured on the target computer. Select the service where the service notification is to be applied to and click the “Next” button. Now the message text and recipients page will appear which will look like in figure 7.71.
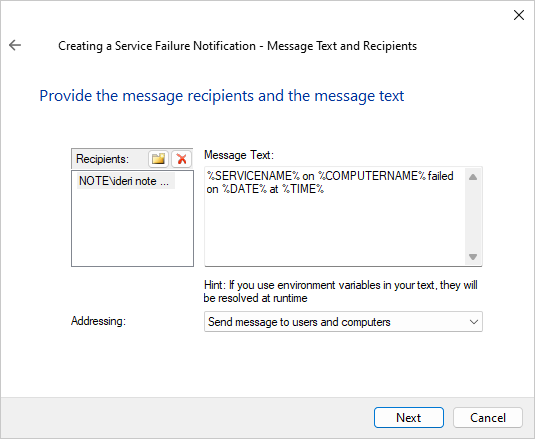
Fig. 7.71 Message text and recipients selection page of the service notification wizard
On this page you can specify the recipients of the message that is created when the service fails, as well as the message text. Like in figure 7.71 you can keep the message text fairly generic and use environment variables which will then be resolved at message creation time to their current values. The special environment variable SERVICENAME can be used which will resolve to the service’s name at message creation time. Note that the IDERI note command line tools will apply this environment variable to themselves during runtime, no additional environment variable is created on the target computer. If you now click the “Next” button, the page for additional message details will appear like in figure 7.72.
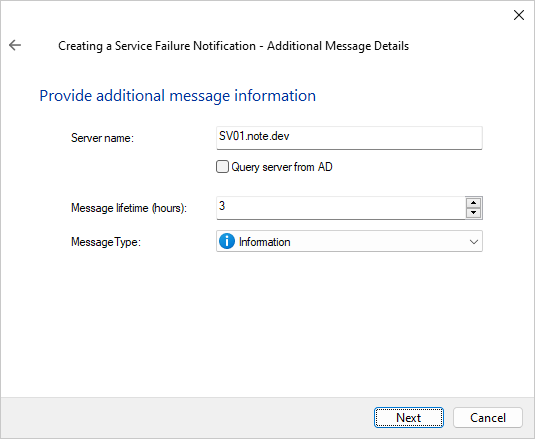
Fig. 7.72 Additional message details page of the service notification wizard
Here you have to specify the IDERI note server where the message is created when the service fails. If your IDERI note server can be determined via an AD query because it is registered as a Service Connection Point, you can also tick the checkbox labeled “Query server from AD” instead of supplying a server name. The message that is created if the service fails will always have as the start time the current time. Since you cannot specify an absolute end time of the message, a message lifetime in hours can be specified on this page, as well as the priority of the message (information, warning or alert).
If you now click the “Next” button, the page for the service failure recovery will appear like in figure 7.73.
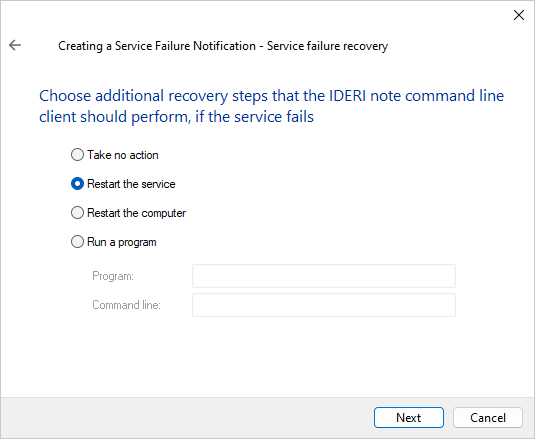
Fig. 7.73 Service failure recovery page of the service notification wizard
On this page you can specify recovery options that the IDERI note command line tools should perform after having created the IDERI note message as a result of the service failure. Note that these recovery options will always be performed from the LocalSystem account or in case the service runs as NetworkService, from the NetworkService account.
If you now click the “Next” button, the page for the service action choice will appear like in figure 7.74.
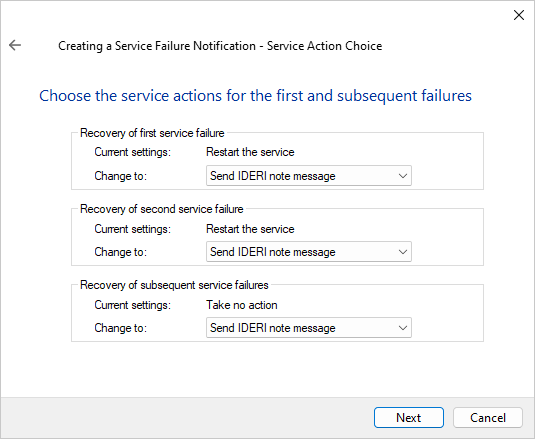
Fig. 7.74 Service action choice page of the service notification wizard
On this page you can specify what action is performed if the service fails for the first time, the second time or all subsequent times. The default selection on this page is to create an IDERI note message for all three actions. The alternate choices for these actions are to do nothing, to restart the service or to reboot the computer.
If you now click the “Next” button, the finish page will appear like in figure 7.75.
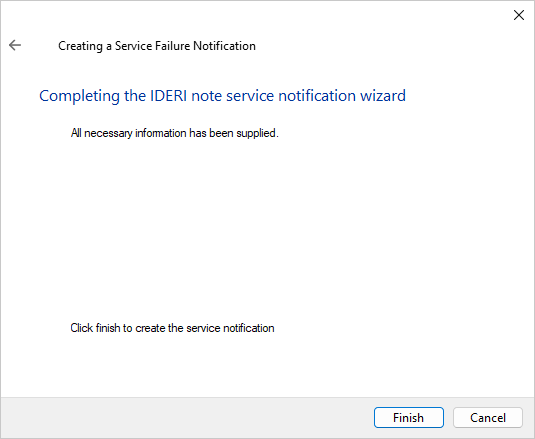
Fig. 7.75 Finish page of the service notification wizard
In order to create the service notification with the settings you chose during
the course of the wizard, click the finish button on this page now. It will
then take a few seconds to apply the service failure notification to the
selected service and computer. In case an error happens during the creation of
the service notification, a messagebox will appear that will help identify the
reason for the error. For additional troubleshooting, a log file is created
while the wizard runs. It can be found in the directory
%TEMP%\ideri\intadmin as a file named SvcNotifyXYZ.log, with
XYZ being an eight digit number.