


7.13. Configuring home office address ranges
With larger parts of the work force working from home, sending home office users IDERI note messages about incidents that are relevant only to on-site users doesn’t always make sense. On the other hand, addressing specifically those users that work from home with an IDERI note message, can be an appealing option as well. For this reason, IDERI note can specifically address users or exclude users that work from their home office location with two easy to understand and self-explaining message options. Figure 7.26 shows these two options in the IDERI note administrator dialog for new messages.
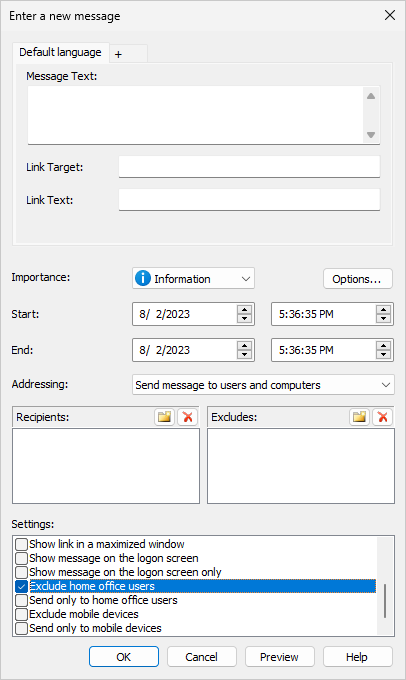
Fig. 7.26 The two home office options “Exclude home office users” and “Send only to home office users”
In order for the IDERI note server to determine if a client is connected from at home via VPN, the IDERI note service must be configured to know about the IP address ranges that are used via VPN. In order to do so, start the IDERI note service control panel applet on your IDERI note server and activate the tab labelled “Home Office IP ranges”. This will show an empty page as in figure 7.27.
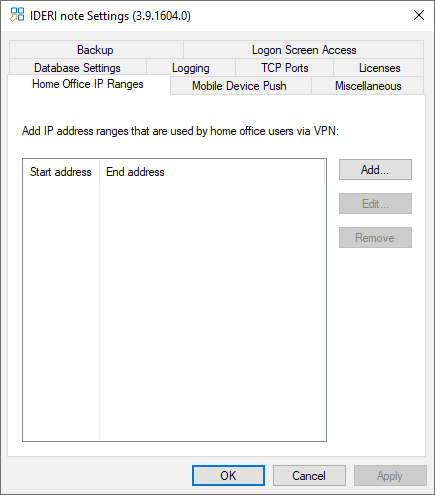
Fig. 7.27 The IP address range page in the IDERI note service control panel applet with no IP address ranges defined.
In order to find out the IP address ranges used in your company you may want to ask a network administrator. Typically, VPN addresses for home office users are within IPv4 only address ranges. In order to add an address range, click the button labelled “Add…”, and a new dialog as shown in figure 7.28 will appear where you can enter an IP address range using a lower IP start address and a higher IP end address. The ranges supplied in this dialog are inclusive, i.e. in the example in figure 7.28, the start address 192.168.0.0 and the end address 192.168.0.255 both belong to the range.

Fig. 7.28 Entering an IP address range using a lower start address and a higher end address
Now press the OK button on this dialog and the IP address range will be entered in the control panel applet page as shown in figure 7.29.
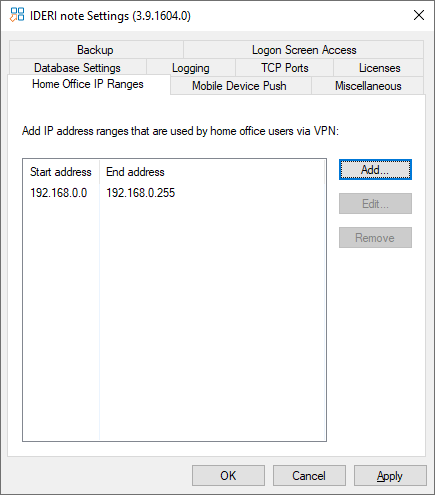
Fig. 7.29 An IP address range added to the control panel applet
If your network environment consists of multiple IP address ranges for VPN connections of home office users, repeat the preceding steps for all additional IP address ranges.
In order to apply all changes on this page, press the button labelled “OK” or the button labelled “Apply” on the control panel applet. You will then be prompted to restart the IDERI note service.