


7.4. Configuration and control of mobile push messages
Like everything else in IDERI note, the entitlement to receive mobile push messages is configurable using integrated Windows® security mechanism. On the basis of this functionality, individual Active Directory® users or groups can be configured to be able to receive mobile push messages or to have the reception of mobile push messages denied. In addition, receiving push messages can be granted or denied even on a per-device level in IDERI note. The following sections will present these two options in detail. Section 7.4.1 will show how reception of push messages is configured with integrated Windows® security mechanisms whereas section 7.4.2 will show, how individual devices can be enabled or disabled for push message reception. Note that all these configuration options are not performed on any mobile device itself but rather on the backend of IDERI note. Therefore, the term “entitlement to receive mobile push messages” is a bit misleading: In a technical sense, it rather means “the entitlement to have the IDERI note server send push messages” for the device or user in question, which is admittedly rather clumsy. If a specific user or device is not entitled to receive push messages, the IDERI note server simply does not send a push message to the device.
7.4.1. Control of push message reception with integrated Windows® security
The access right to receive push messages is modeled as the general security policy setting (see also section 4.4) “Receive mobile push” as shown in figure 7.12.
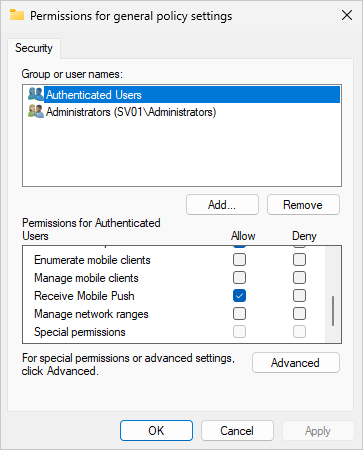
Fig. 7.12 General security policy setting “Receive mobile push”
By default, “authenticated users” will have this access right granted out-of-the-box, but this can be changed at will. Note that figure 7.12 also shows two other general security policy access rights named “Enumerate mobile clients” and “Manage mobile clients”, which will become more important during the next sections. For now it is sufficient to know that by default all principals with the access right “Enumerate connected clients” will have the access right “Enumerate mobile clients” granted as well and that all principals with the access right “Create new message” will have the access right “Manage mobile clients” granted. In addition, members of the local administrators group will have both access rights granted by default.
Using the general security policy settings, individual users or groups can be granted or denied the reception of mobile push messages. Granting the entitlement to receive push messages on this configuration level is convenient and probably sufficient for most organizations. However, in addition to this, IDERI note also allows the configuration of push reception on a per-device level. Section 7.4.2 will show how configuration for push reception is done on a per-device level.
7.4.2. Control of push message reception on the device level
By default, the IDERI note service runs in “automatic” push mode. In section 3.14 figures 3.71, 3.74 and 3.82 show the page labeled “Mobile device push” of the IDERI note service control panel applet with the checkbox labeled “Automatic mobile client push mode” ticked. Unticking this check box will switch the IDERI note service configuration into manual push mode. However, before we perform this configuration change, we first need a more thorough understanding of the “Automatic mobile client push mode” in order to understand the implications of the manual push mode.
When an IDERI note message becomes due and is about to be pushed to mobile devices, the IDERI note service needs to know which devices it has to send the push message to. For this purpose, the IDERI note service maintains a list of mobile devices that ever made a connection to it alongside some more information about the devices, such as their user name, their public key (for end-to-end encryption of push messages), their so-called “push token”, that uniquely identifies app and device for the platform push services (Apple push notification services for iOS/iPadOS devices or Firebase Cloud Messaging for Android devices) and other information such as the last connection time and the connection GUID of the device. Active Directory® principals with the general security policy access right “Enumerate mobile clients” (see section 7.4.1) can inspect this information with the button labeled “Mobile client management” on the “Settings” category’s “Miscellaneous” ribbon panel in IDERI note administrator (see figure 7.13).
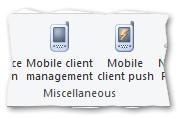
Fig. 7.13 The “Mobile client management” button in the IDERI note administrator ribbon control
After pressing this button, the “Mobile Client Management” dialog window will appear as in figure 7.14.

Fig. 7.14 The “Mobile Client Management” dialog window
Note that all entries for mobile clients in this dialog have the value “Automatic” in the third column (“Push enabled”). When running in automatic push mode, the IDERI note service will send a push message to all mobile devices that the message is destined to (i.e. the device’s user is in the message’s recipients list) and that have the general security policy access right “Receive mobile push” granted (see section 7.4.1). However, the IDERI note service sends a push message only to as many devices as the number of mobile device licenses allows. It does so by ordering the “candidate devices” by their last connection time and if the number of licenses doesn’t suffice for sending the push message to all devices, it ignores those devices that haven’t connected to the IDERI note service for the longest time.
Most organizations will probably leave the automatic mobile client push mode turned on, but if finer grained control or a fixed number of devices to be pushed is a requirement, automatic mode needs to be switched off. For this purpose, start the IDERI note service control panel applet and activate the tab labeled “Mobile client push”. Untick the checkbox labeled “Automatic mobile client push mode”, press the apply button and answer “Yes” if requested to restart any service. Figure 7.15 shows this page with automatic mobile client push mode turned off.
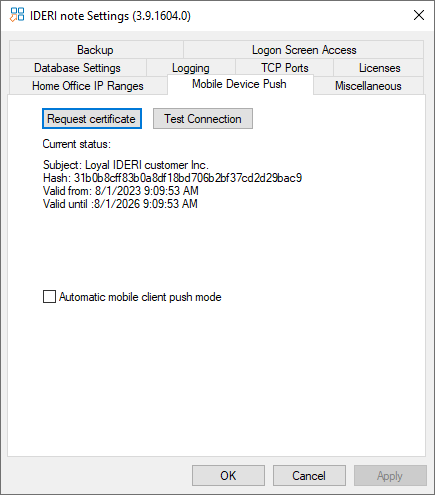
Fig. 7.15 Automatic mobile push mode turned off
After turning off the automatic mobile client push mode, invoke the “Mobile Client Management” dialog again in IDERI note administrator. This dialog will now look like in figure 7.16.
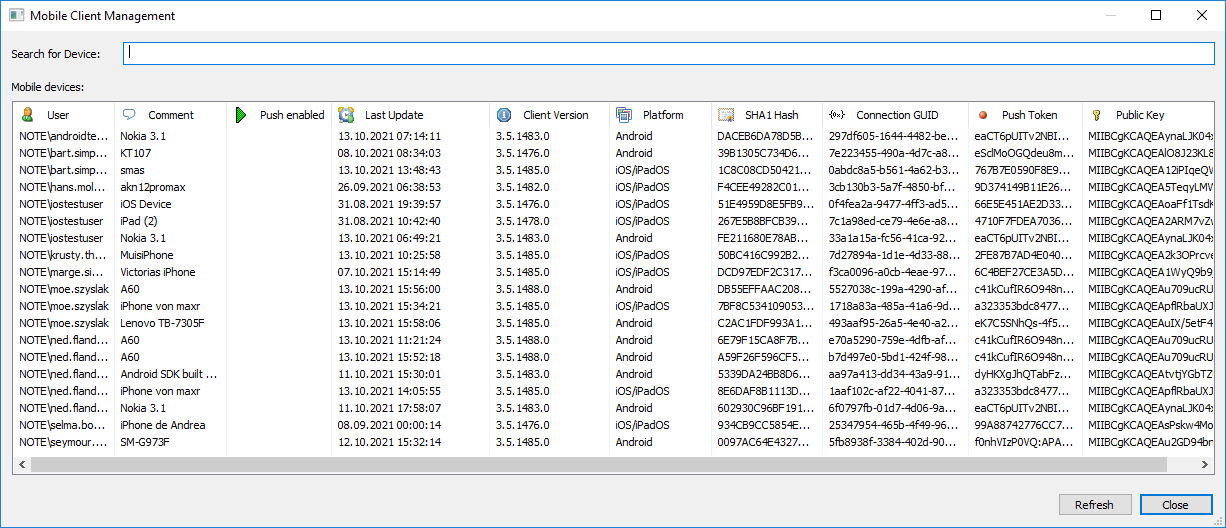
Fig. 7.16 The “Mobile Client Management” dialog window with automatic mobile client push mode turned off
Notice that the third column (“Push enabled”) is now completely empty and that no push operation to any device takes place in this state. In order for a particular device to be enabled for push message reception, right click its entry in this dialog and a context menu will appear like in figure 7.17.
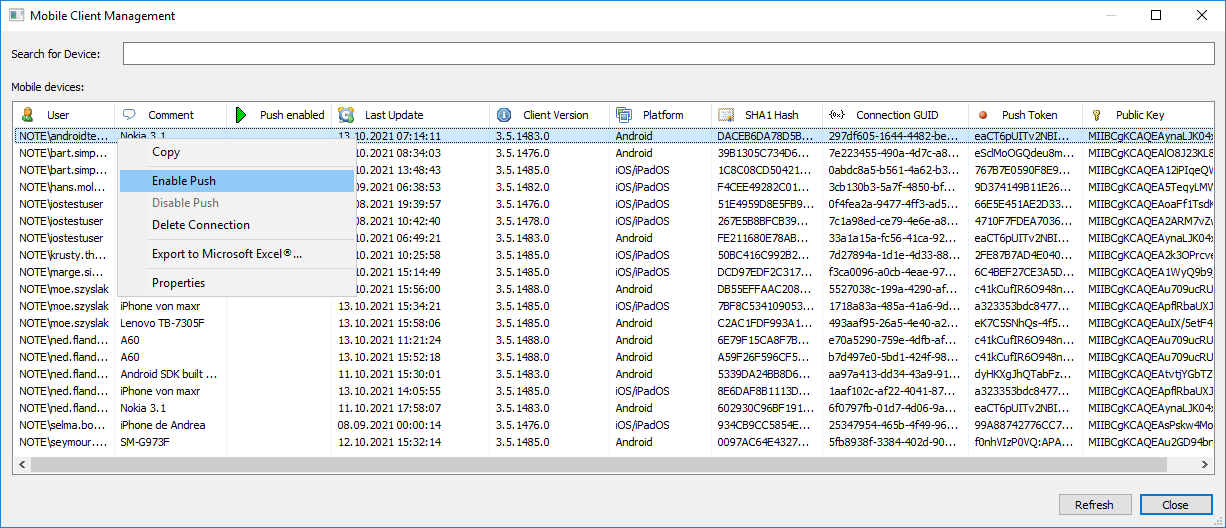
Fig. 7.17 Activating a device for push reception in manual mobile client push mode
After enabling push for the first entry as shown in figure 7.17, the “Mobile Client Management” dialog will appear as in figure 7.18, with the entry in the “Push enabled” column set to “Yes”.
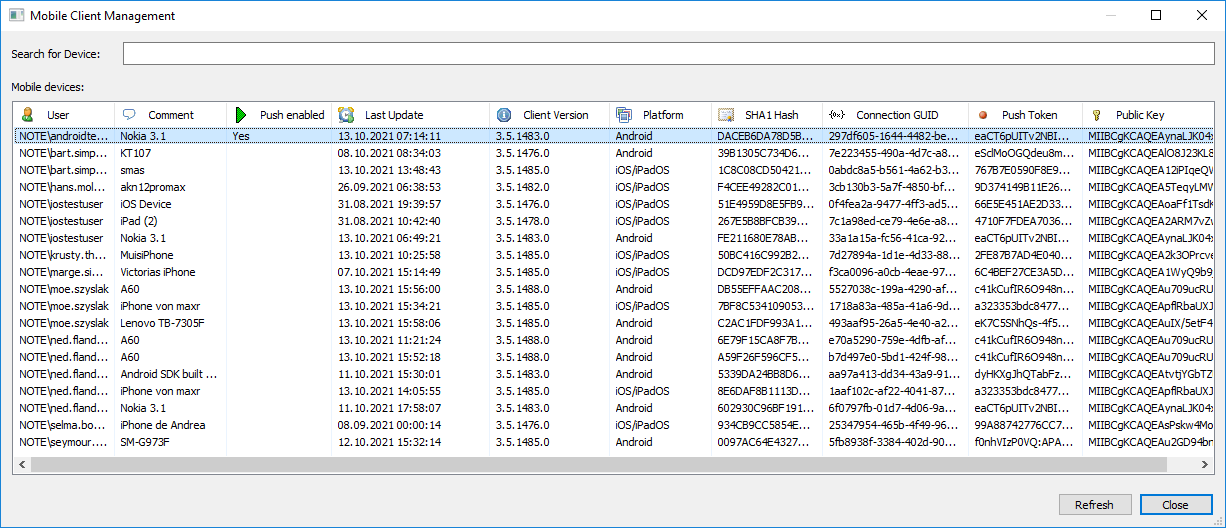
Fig. 7.18 A device has been activated for push reception in manual mobile client push mode
Now this is the only device that - if its user is granted the general security policy access right “Receive mobile push” (see section 7.4.1) - the IDERI note server will send a push notification to, if its user is in the recipients list of an IDERI note message. In order to enable more devices for push reception, repeat the steps shown in this section for each individual device. Note also that the context menu shown in figure 7.17 has some more entries that allow you to disable push again for a push enabled device or to delete the mobile connection. Enabling, disabling or deleting a mobile connection requires the general security policy access right “Manage mobile clients” granted (see section 7.4.1). Deleting a device is sometimes necessary if users uninstall the IDERI note mobile client from their mobile device or if a device gets retired or lost. There is no way that the IDERI note service gets notified about these incidents so manual pruning of devices might be required from time to time. The “Copy” context menu entry in figure 7.17 simply copies device information about a single selected device onto the clipboard as text.
If you invoke the “Properties” menu item in the context menu in figure 7.17, a property page for the mobile device connection will appear as in figure 7.19.
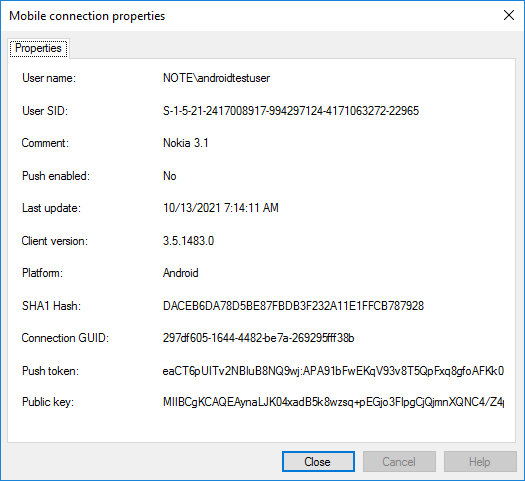
Fig. 7.19 A mobile device connection property page
Note that you can also select and copy individual text items in this property page using the mouse or using the tab key.