


3.14. IDERI note Server mobile push configuration
In order to provide mobile devices running Android or iOS/iPadOS with push messages, some extra steps are required in order to create an authenticated connection with the IDERI note mobile push infrastructure. The following paragraphs will outline in minute detail, how to perform all necessary configuration steps.
Attention
Active Directory® settings for a successful implementation
In a standard Active Directory® configuration, no additional efforts are required to set up an IDERI note server for a successful implementation of mobile push functionality. However, as a hardening measure, many organizations strive to reduce the number of members in the builtin “Pre-Windows 2000 Compatible Access” group. Membership in this group ensures that a principal has access rights to read the group membership of each other principal in Active Directory®. In a standard Active Directory® configuration, “Authenticated Users” are a member of this group. If this is the case in your Active Directory® configuration, no additional configuration is required. However, if this is not the case, you have to add the computer account of the IDERI note server to the “Pre-Windows 2000 Compatible Access” group or otherwise have to make sure that the computer account of the IDERI note server has read access to the group membership attribute of each principal in Active Directory® that should be notified with a mobile push operation.
In order to use the mobile push functionality, it is necessary to add a mobile license key to the IDERI note service configuration, as the license key will be used once to authenticate via a transport layer secured webservice call (TLS 1.2) against the IDERI note mobile push infrastructure in order to retrieve a client certificate that will be used to authenticate subsequent push operations. In case you do not already have a permanent or time restricted mobile license key, please request one from sales@ideri.com in order to follow along the configuration steps in the following paragraphs with your own licensing information.
After installation of the IDERI note service as shown in section 3.2 and after having added licensing information for desktop clients as shown in section 3.13, mobile clients can already connect and establish a connection with the IDERI note service via the IDERI note mobile gateway, but cannot receive push messages, as long as there is no authenticated connection between the IDERI note service, which is running in an on-premise environment and can send push messages, with the IDERI note mobile push infrastructure running on the internet.
Attention
Router/Firewall/Proxy settings for the connection to the IDERI note mobile push infrastructure
All communication with the IDERI note mobile push infrastructure uses TCP Port 443 and is transport layer secured (TLS 1.2), so a connection to the IDERI note mobile push infrastructure requires outgoing connections from the IDERI note service to the IDERI note mobile push infrastructure (mobilepush.iderinote.com) for this TCP port to be enabled on enterprise routers that protect the on-premise environment from the global internet. Since the actual push operation uses client certificate based authentication against the IDERI note mobile push infrastructure, it is not possible to create a connection from the IDERI note service to the IDERI note mobile push infrastructure with an SSL interception proxy that intercepts transport layer secured communication with dynamically created certificates. Since any meaningful content between the IDERI note service and the IDERI note mobile push infrastructure is end-to-end encrypted anyway, monitoring this communication for any gain in knowledge is a futile undertaking anyway. General proxy support for this communication is planned for a future release of the IDERI note service.
In order to set up the IDERI note service’s connection to the IDERI note mobile push infrastructure, invoke the IDERI note server control panel applet and activate the tab labeled “Mobile Device Push”. Without any mobile license entered beforehand, the control panel applet will look like in figure 3.71.
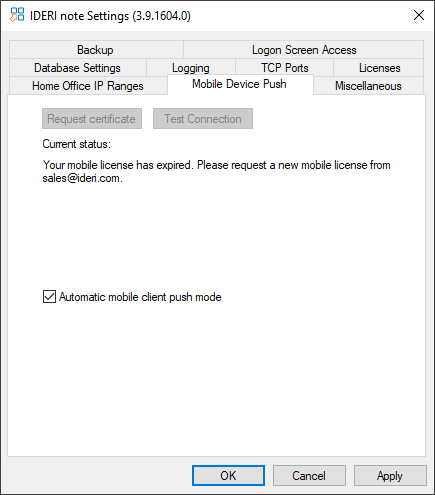
Fig. 3.71 Mobile device push page without any mobile license entered
Following the advice on this page we head over to the license page which might look like figure 3.72 with only one desktop client license added, in this case a professional version.
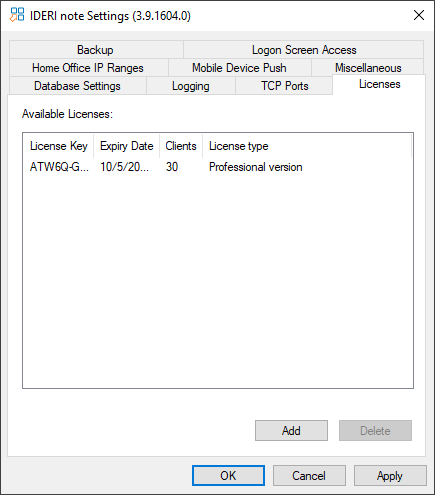
Fig. 3.72 License page without a mobile license added
In the following text we now assume that we have mobile licensing information available: As before in section 3.13, our licensee name is “Loyal ideri customer Inc.”. The mobile license key for this licensee name is “AS5HF-9GADZ-xxxxx-xxxxx-xxxxx-xxxxx-xxxxx-xxxxx”. If we enter this license information in the same way as described in section 3.13 and afterward press the “Apply” button, the license page looks like in figure 3.73. If you are requested to restart any service during the course of this setup, respond with “Yes” on any such request.

Fig. 3.73 License page with our mobile license added
After having added the license, we now switch back to the page labeled “Mobile Device Push”, which is now looking very much different from figure 3.71 with the button labeled “Request Certificate” now no longer being disabled. Figure 3.74. shows the mobile device push page with a valid mobile license available.
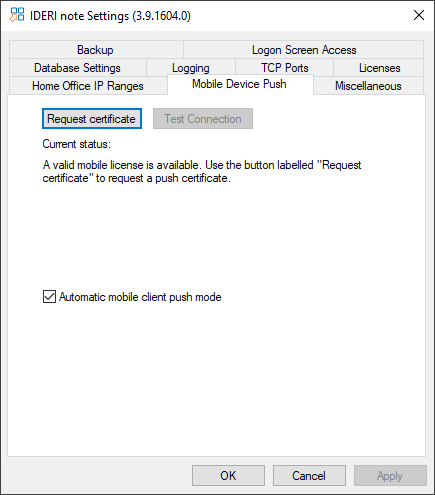
Fig. 3.74 Mobile device push page with a valid mobile license available
In order to request the certificate that is necessary for subsequent push operations, press the button labeled “Request certificate”. This will invoke the IDERI note mobile client certificate request wizard as shown in figure 3.75.
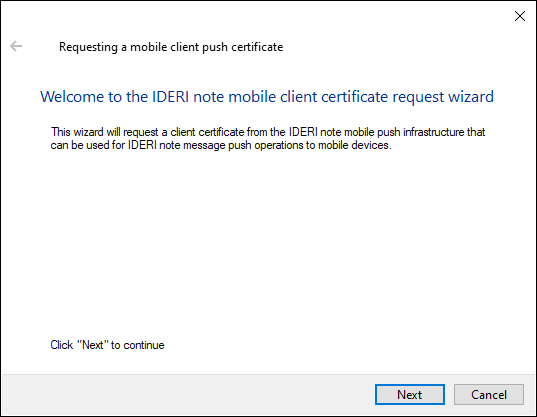
Fig. 3.75 The welcome page of the IDERI note mobile client certificate request wizard
Click the button labeled “Next” in order to proceed with the wizard. This will show the order processing contract (see figure 3.76), which is downloaded with transport layer security from https://docs.ideri.com. You have to agree to this contract in order to use the IDERI note mobile client push functionality. This page is initially shown with the checkbox labeled “I accept this agreement” in a disabled state. In order to make sure you have read the agreement, this checkbox will only be enabled if the text in the agreement has been scrolled to its end.

Fig. 3.76 Initial look of the page with the order processing contract
After the checkbox has been ticked, the page looks like in figure 3.76 with the button labeled “Next” enabled.
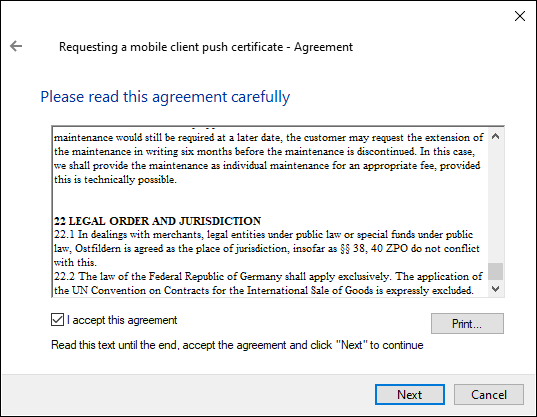
Fig. 3.77 The page with the order processing contract with the checkbox ticked
Use the button labeled “Print…” in order to create a paper copy of the order processing contract. In order to proceed with the wizard, press the button labeled “Next” and another page will open (see figure 3.78) that requires you to save the order processing contract to a safe place.
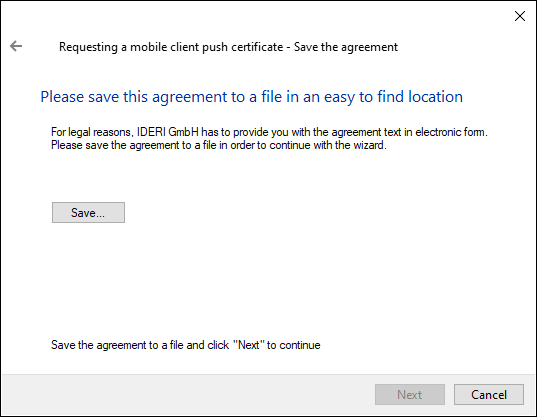
Fig. 3.78 Order processing contract save page
Only after you have pressed the button “Save…” and have successfully saved the document to a file, the button labeled “Next” will be enabled again (see figure 3.79).

Fig. 3.79 Order processing contract save page with the document saved
Now press the button labeled “Next” and the certificate request will be sent to the IDERI note mobile push infrastructure. This can a take a few seconds, therefore a new page is shown as in figure 3.80 that illustrates this process.
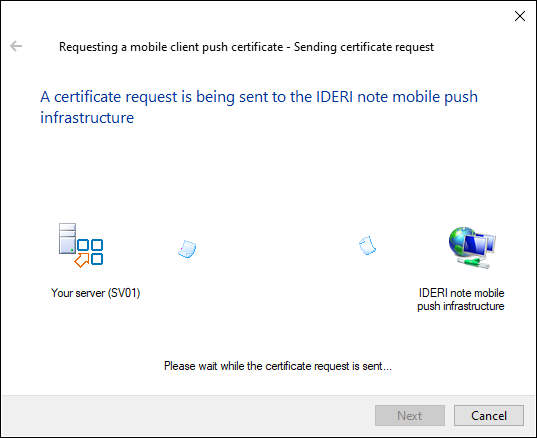
Fig. 3.80 The request is being sent to the IDERI note mobile push infrastructure
If this request completes successfully, the completion page will be shown as in figure 3.81.
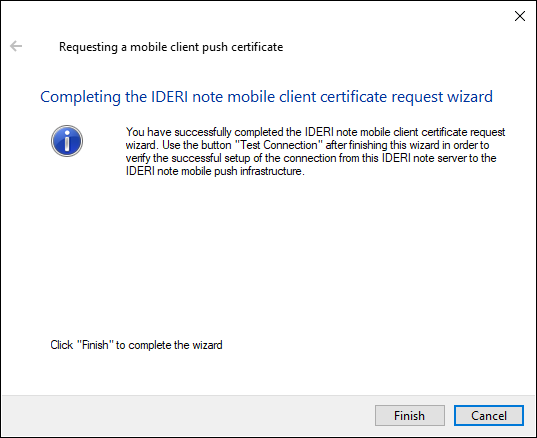
Fig. 3.81 The completion page of the wizard
Now click the button labeled “Finish” and the IDERI note push service (intpushsvc) will restart.
If the wizard had completed successfully, a client certificate has been retrieved from the IDERI note mobile push infrastructure and its most important data will be shown as in figure 3.82.
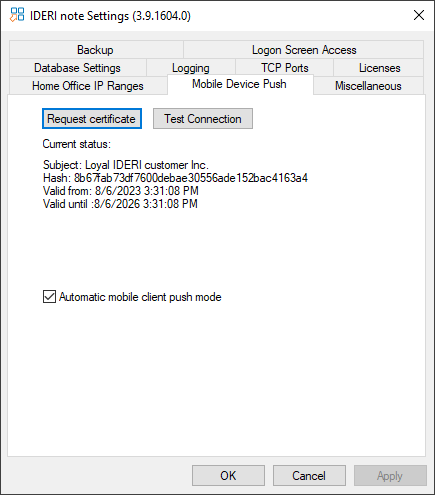
Fig. 3.82 Mobile device push page with a client certificate installed
From this point on, push operations will be performed by the IDERI note server to the IDERI note mobile push infrastructure. As a convenience, the button labeled “Test connection” is now enabled as well and can be used to test the connection with the client certificate that was just requested. If we now press this button, a connection will be established to the IDERI note mobile push infrastructure and will show a message box like in figure 3.83 if the connection could be established successfully.
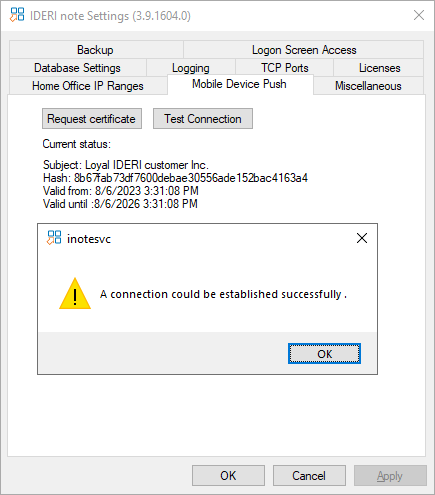
Fig. 3.83 Mobile device push page with a successful connection test result
Now the IDERI note service is fully configured for push operations to mobile clients. Please note that the client certificate that was requested during the course of this configuration has a finite validity. The validity period of this certificate is governed by the validity of the license information, that was used to request the certificate, but will never extend a period of three years, even if a permanent license without time restriction was used for the request. In order to be able to request a new client certificate in due time, the IDERI note Administrator will show a message when connecting to the IDERI note server, if the client certificate’s validity is 14 days or less.