


3.13. Adding licensing information
Up to now this documentation has not yet covered, how licensing information is added to an IDERI note installation. Actually, in order to evaluate IDERI note, adding licensing information is not even required, because each IDERI note installation comes with 5 free permanent client licenses. If you have the need to evaluate IDERI note in a larger installation with more than 5 clients, you can contact the IDERI sales department in order to request additional time-limited licenses.
If you decide to purchase a number of client licenses from IDERI, you will receive two pieces of information, a licensee name and a license key.
The licensee name will be derived from your company name and the license key will be a sequence of alphanumeric characters, separated by hyphens.
The licensee name might for instance be the imaginary name “Loyal ideri customer Inc.” and the license key might be “ATVKI-Q2E7N-xxxxx-xxxxx-xxxxx-xxxxx-xxxxx-xxxxx”. You can add this licensing information into your IDERI note installation by starting the IDERI note control panel applet. The IDERI note control panel applet is the applet with the label “IDERI note 3.1” in control panel.
On a Windows® Server core installation it can be invoked by starting the application corecfg.exe in the IDERI note service installation folder. After selection of the fourth tab, labeled “Licenses”, the applet will look like figure 3.67 if no licensing information has been added yet.
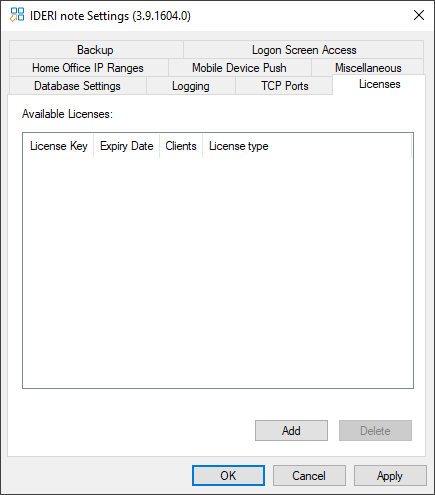
Fig. 3.67 Licensing page with no licenses added
In order to add a license, press the button labeled “Add”. A dialog like in figure 3.68 will appear.
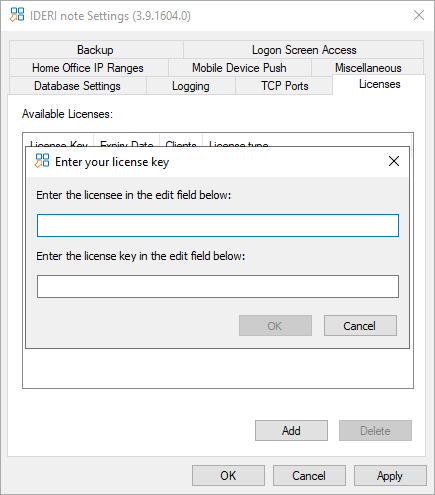
Fig. 3.68 Dialog for entering license information
Now add your licensing information, similar to figure 3.69.
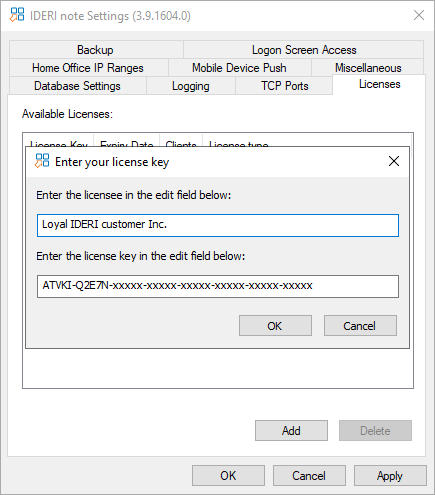
Fig. 3.69 Licensing information entered in the dialog
After pressing the OK button, the licensing information will be validated. This operation can take a few seconds to proceed. After that, the license will be visible in the control panel’s fourth tab, much like in figure 3.70.
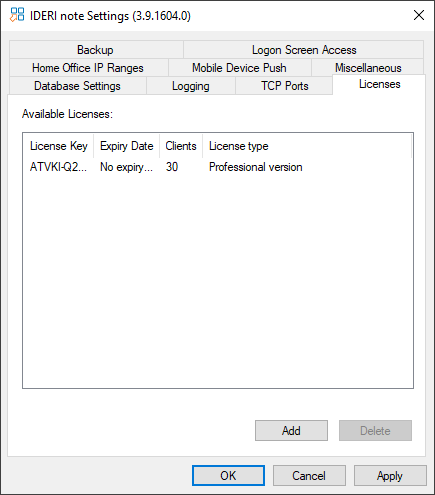
Fig. 3.70 Licensing information added to IDERI note
In order to save the new license information you now have to press either the button labeled “OK” or the button labeled “Apply” on the IDERI note control panel applet. Note also that any licensing information will be evaluated by the IDERI note service during its initialization phase. Therefore you have to restart the IDERI note service in order to activate the newly added licensing information. The maximum number of licenses that can be added per one license key is roughly 65.000. However, if you have purchased a license key for a certain number of licenses, you can at any time add a new license key to be purchased from IDERI, using the procedure described above, so the maximum number of licenses per IDERI note server is only limited by main memory of the computer running the IDERI note service. The total number of licenses will always be the sum of all licenses entered via the procedure described in this section.