4.5. Changing messages
After our brief detour to the security topics associated with IDERI note, we return to the scenario from section 4.2. We now change the message a few times and watch what happens on the desktop of our user Albert.Tross.
An important concept that we introduce at this point, is the concept of message revisions. Each message that is created in IDERI note has at least one revision. You can think of a message revision as a “version” of a message, because each time a message is created or changed, a new revision of the message is created as well. Revisons can easily be inspected by selecting a message in IDERI note Administrator and then choosing the “Revisions…” button from the “Messages” panel of the ribbon’s “Home” tab. As an alternative, do a right mouse button click on the message and choose the “Revisions…” menu item from the context menu. If we do this for the first message that we created in section 4.2, we will get a screen like in figure 4.20.
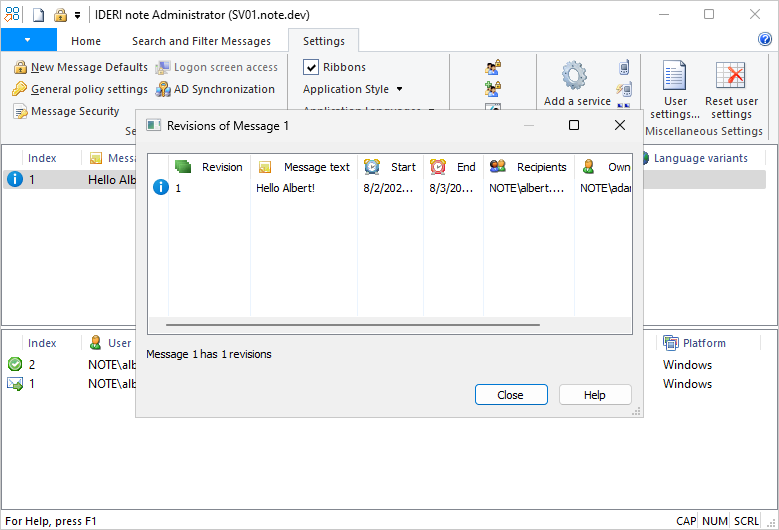
Fig. 4.20 The first revision of the first message
You will notice that there is one entry in this dialog which corresponds to the single revision of the first message that we just created. If you do a right mouse button click on the revision in this dialog, you will get a context menu with two entries, “Restore” and “Properties”. If you select the “Properties” menu item, you will get a dialog that is identical to figures 4.7 and 4.8, shown in section 4.2, except that the security settings on the second page of the revision’s property are read-only.
If you instead choose the “Restore” menu item, you can make the selected revision the current revision. However, this does not delete any other revisions, instead it creates a new revision that is an exact copy of the selected revision. Note also, that it is not possible to delete a single revision. You can only delete a message with all of its revisions.
Now we click the “Close” button in the revisions dialog and change our first message. We do this with a double click on the message in IDERI note administrator. We will again see a screen similar to the one we had when we just created the message. This time, however, the caption of the message dialog is not anymore “Enter a new message” but instead reads “Update an existing message”. We now select the name “Albert.Tross” in the “Recipients” control and click the button with the red “X” symbol in order to delete the name “Albert.Tross”. The list box will now be empty. Next we click the ellipsis button (”…”) and enter “Domain Users” in the standard selection dialog that appears. As a final step we change the value of the combo box labeled “Importance” from “Information” to “Warning”. The screen should now look like figure 4.21.
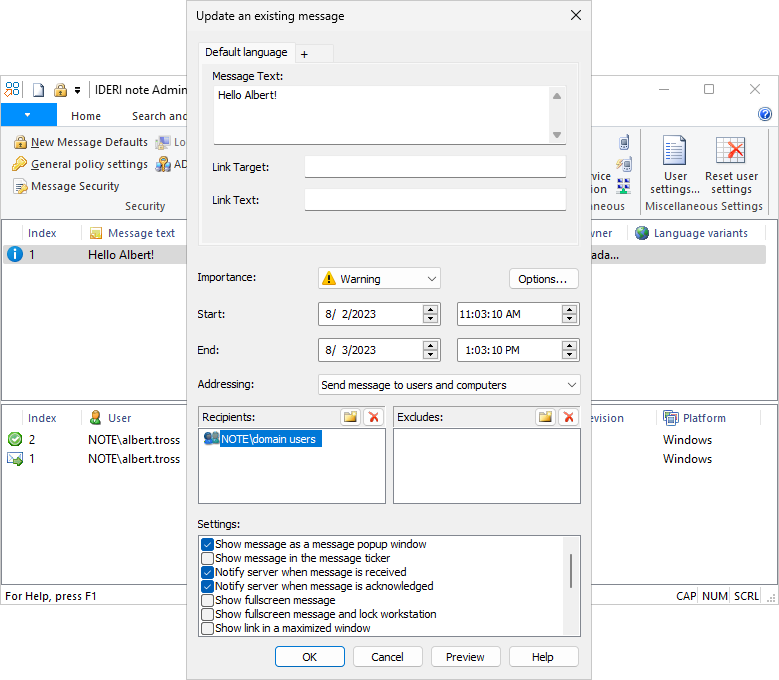
Fig. 4.21 Changing the first message
After clicking the OK button, we now again inspect the revisions of the first message and select the “Revisions…” button from the “Messages” panel of the ribbon’s “Home” tab. We will see a screen that looks like figure 4.22.
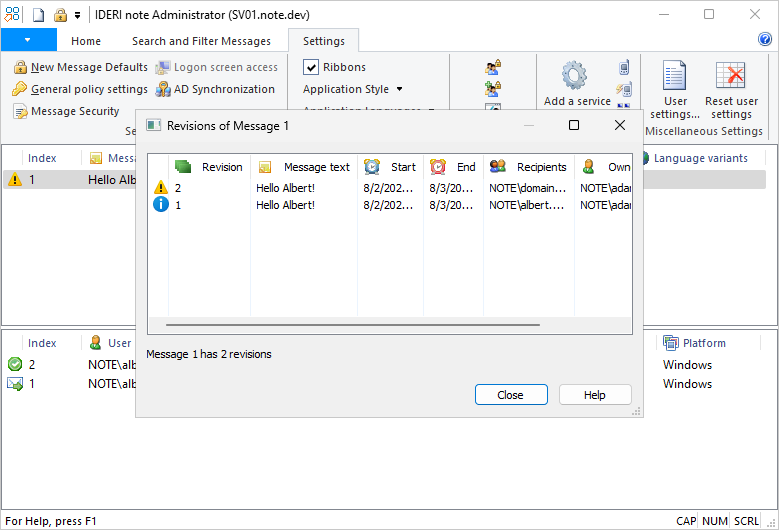
Fig. 4.22 Two revisions of the first message
Note that the changes we just made have resulted in the creation of a new revision of the message. If we now wait a few minutes and watch what happens on the desktop of Albert.Tross, we will see that the modified message reappears as in figure 4.23, because Albert.Tross is a member of the domain users group.
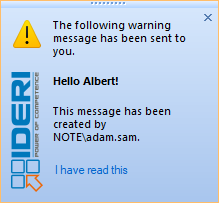
Fig. 4.23 The first message modified to a warning message on the desktop of Albert.Tross
Attention
Experimenting with your own groups as message recipients
In the above example we selected a builtin group of Active Directory®, namely the “Domain Users” group as the message recipients. As outlined in section 4.2 you can also use your own groups you created in Active Directory®, not only builtin groups. When evaluating IDERI note in an Active Directory® test environment you might now be tempted to create your own groups, make Albert.Tross a member of them and select them as message recipients. Note however, that a change in Active Directory® group membership will not immediately have an effect on the IDERI note client process running on the desktop of Albert.Tross, after the client has created a connection to the IDERI note server. If you change the Active Directory® group membership of Albert.Tross and intend to immediately use this ad-hoc change in Active Directory® with messages destined to a new group, where Albert.Tross is now a member of, this will only be reflected in the connection of the client process running on the desktop of Albert.Tross if one of the following two things happens:
Albert.Tross logs out and logs in again. This will automatically update the group membership of Albert.Tross when connecting to a remote resource such as the IDERI note server.
A sufficiently privileged user of the IDERI note administrator performs an Active Directory® resynchronization of all connected clients. This will instruct the IDERI note client running on the desktop of Albert.Tross to close its current connection to the IDERI note server, purge its Kerberos ticket cache and reconnect with updated Active Directory® group membership information to the IDERI note server. An Active Directory® client resynchronization is performed from within IDERI note administrator using the button “Resynchronize Clients with AD” on the “Home” ribbon tab. For more detailed information on Active Directory® client resynchronization read section 7.12.
In order for an Active Directory® resynchronization to have an effect on clients that are already connected to their IDERI note server and on newly created messages, the following operations should be performed in exactly this order:
First make your changes in Active Directory®.
Next, perform the client resynchronization from within IDERI note administrator.
As the last step, create new messages that should utilize the updated client group membership information.
Notice that the message has now been sent as a warning message. By default from IDERI note version 2.5 on, this message will be shown on the desktop of Albert Tross until its validity has expired or Albert Tross has acknowledged the message. However, as part of the client installation, an interval can be specified for each message type, after which messages will vanish automatically. As an example, it could be possible to configure warning messages to automatically vanish after 40 seconds and information messages to vanish after 20 seconds, which was the default setting in previous versions of IDERI note. The default behaviour for all message types can be changed using parameters to the client msi packages or transforms or by changing registry values. For additional information, consult sections 10.1 and 8.3. Note that after the messages have vanished automatically, they will not be removed completely from the user’s desktop, as the user will see balloon tooltips at regular intervals, that remind the user of a pending message. The user can then click the balloon tooltip to bring the message window again into the foreground and read or acknowledge it.
Turning back to the computer, where the IDERI note administrator is running, we hit F5 now in order to refresh the views.
We will immediately notice that the reception of the message has been sent as a notification to the server, as in figure 4.24.
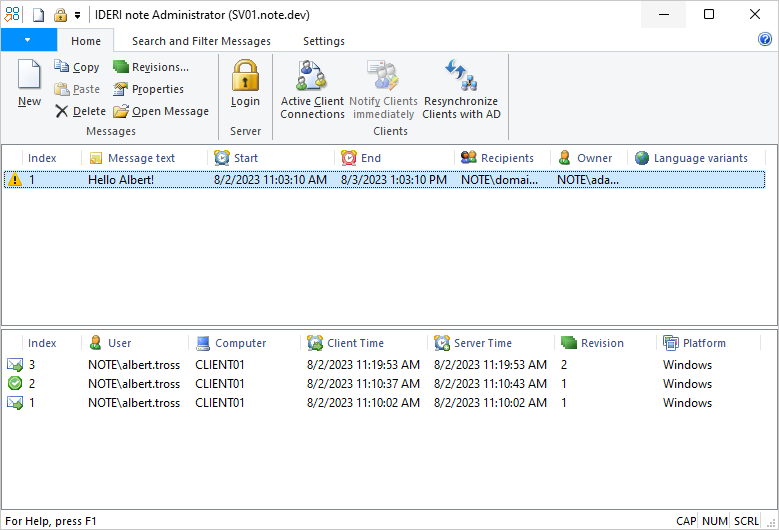
Fig. 4.24 Reception notification of the modified message
Notice that the new reception notification shows the new revision in the revision column. After a few minutes, the IDERI note client program on the desktop of Albert.Tross will resynchronize.
Assuming that Albert.Tross has clicked the link “I have read this” on the message dialog, the client will send the acknowledgement notification back to the server. If we now refresh the views in IDERI note administrator by hitting F5, we will see the acknowledgement notification like in figure 4.25.
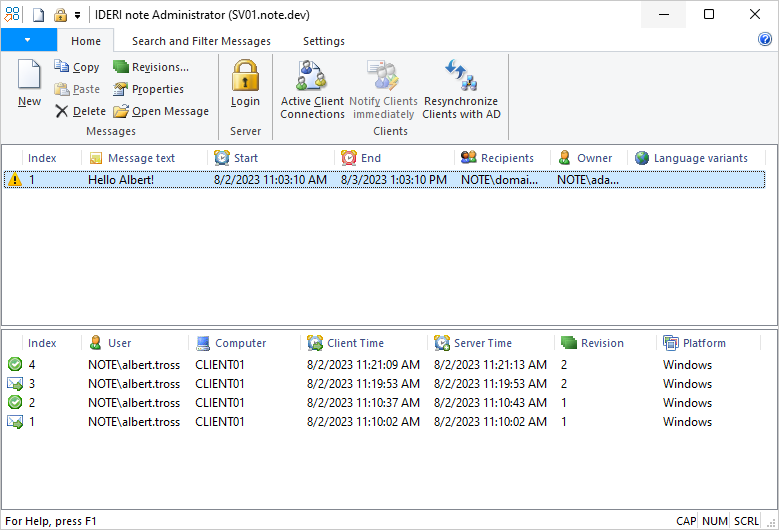
Fig. 4.25 Acknowledgement notification of the modified message


