


4.2. Creating the first message in IDERI note Administrator
We will now create our first message. We want a particular user in the domain ideri with the user name “Albert.Tross”, to receive this message. To do so we choose the “New” button from the “Messages” panel of the ribbon’s “Home” tab. A dialog like in figure 4.3 will appear.
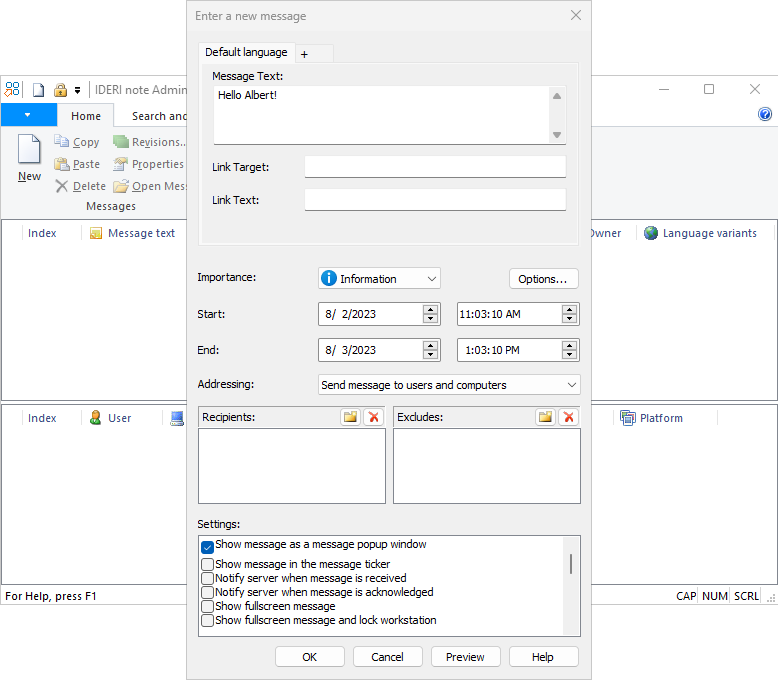
Fig. 4.3 Creating the first message
We add the simple message text “Hello, Albert!” in the message text field and change the message end date to a time in the future. In order to select the recipient of the message we double click on the control labeled “Recipients” and type the recipient of our message in domainname\username notation, i.e. note.dev\albert.tross. As an alternative, we can press the button with the ellipsis (”…”) in this edit line. This will invoke the standard dialog for the selection of users and groups, like in figure 4.4 where we can simply add the name “Albert.Tross” or browse or search for the name among the users that are valid in either the domain ideri or on the computer sv01.note.dev, where the IDERI note service is running.
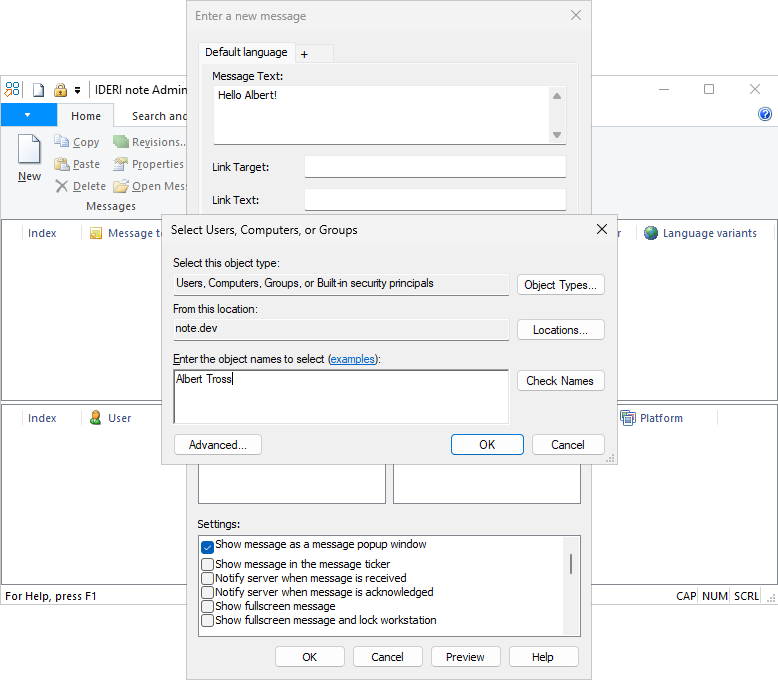
Fig. 4.4 Standard user/group selection dialog for adding a message recipient
After clicking the OK button, the recipient’s name will then be added to the recipients control. We also tick the two check boxes labeled “Notify server when message is received” and “Notify server when message is acknowledged” in the control labeled “Settings:”.
These two settings will make sure that the client receiving the message will send back notifications to the server immediately after the client has received the message and after the user has acknowledged to have read the message. The screen will then look like figure 4.5.
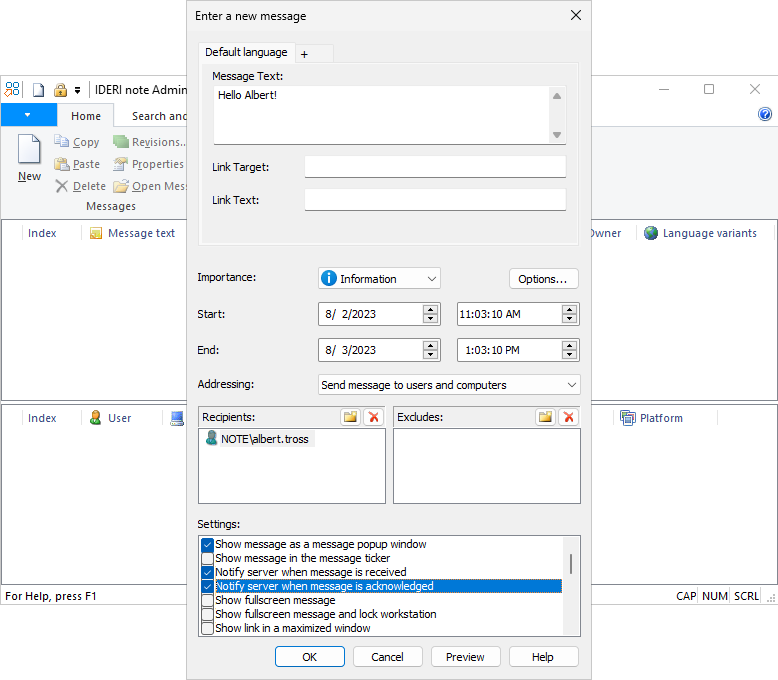
Fig. 4.5 Completing the first message settings
We finally click the “OK” button and the message will be created. Figure 4.6 shows how the screen will now look like with the first message having been created.
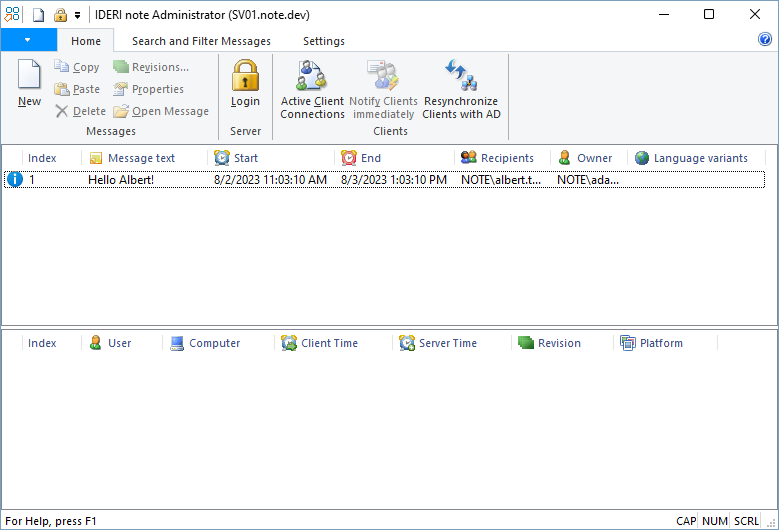
Fig. 4.6 IDERI note administrator with the first message created
Now it might be worthwhile to inspect the properties of the message we just created. For this purpose we select the message and choose the “Properties” button from the “Messages” panel of the ribbon’s “Home” tab. This will invoke the properties dialog for the message. The first page of the message will be shown and look like figure 4.7.
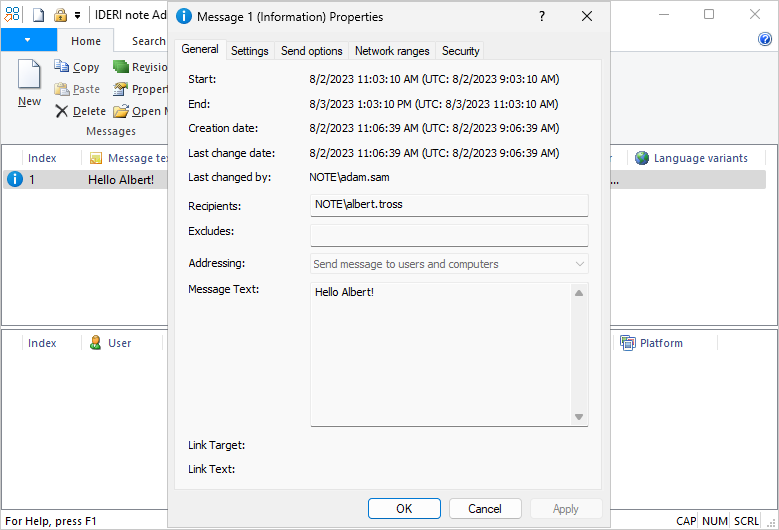
Fig. 4.7 First page of the first message property dialog
As you can see, this page contains all relevant data of the message in a read-only fashion.
In addition, all relevant time data is also given as UTC (Coordinated Universal Time), so when in doubt, you can compare the local time given in this dialog with the time in UTC. Note that internally, the IDERI note server always stores time data in UTC and the IDERI note client internally also only works with time information in UTC. However, the time settings that you make in the message dialog in IDERI note administrator, are always in local time. It is IDERI note administrator who knows what time zone it is running under and whether daylight savings are active. Before storing the time of a message on its server, IDERI note administrator uses this information to convert time information into UTC and sends the time data in this representation to its server. This has implications if you are running IDERI note administrator on a computer that has a different time zone than your client computers. Imagine you are running IDERI note administrator in your company’s headquarter in the USA and you want to create messages that should appear on the desktops of clients in Germany at 9.00 AM German local time.
You should then either temporarily change your computer’s time zone to the time zone of your German clients and create the message to be scheduled at 9.00 AM or you have to make the necessary time conversions on your own. In the latter case, the time data provided in UTC in the properties dialog of the message can help you verify that you made the proper calculations.
Much more important, however, is the second page of this dialog.
After clicking on the tab labeled “Security”, the security page will be shown that looks like figure 4.8.
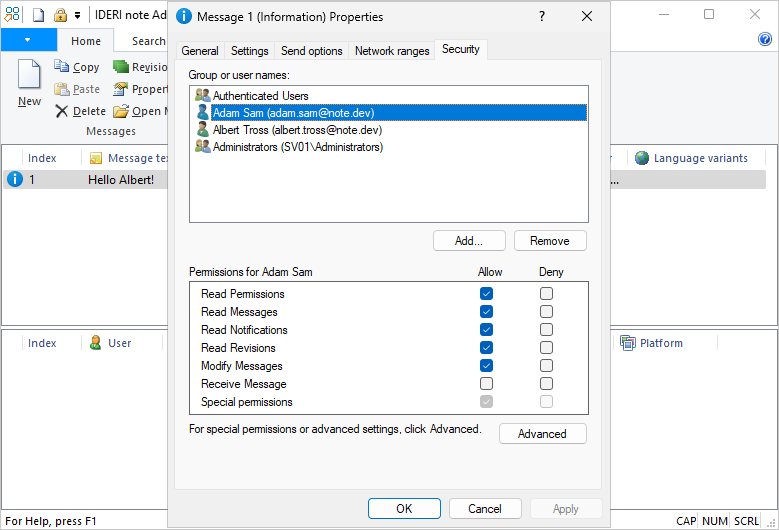
Fig. 4.8 Second page of the first message property dialog
This page shows the security settings for the new message. Note that the creator of this message, Adam.Sam, has full access rights to the message, except for the access right “Receive message”. Now click on the user “Albert.Tross” in this dialog, in order to inspect this user’s access rights to the message. A screen like in figure 4.9 will be shown.

Fig. 4.9 Second page of the first message property dialog with access rights of the recipient
Notice that the recipient of the message, Albert.Tross, only has a single access right granted, the right to receive the message. This is the most important principle of IDERI note:
The right to receive a message is modeled as an access right to a resource, much like you can grant or deny access to other resources like files, registry keys, etc. on an NT based Windows® operating system. Using this model it is very easy to select recipients for an IDERI note message by granting or denying indidividual users or groups the access right “Receive message”.
Attention
Groups as message recipients
In AD, groups to be selected for granting or denying access rights to an IDERI note message, like the right to receive a message, must be global, or in the case of a “native domain” (as opposed to a “mixed mode” domain), can also be domain local groups and universal groups. In both an AD and a workgroup environment, you can use builtin groups and local groups of the computer, where the IDERI note server runs. While in the case of a workgroup environment, local groups of the IDERI note server computer are the only type of group you can use, you should refrain from using local groups of the IDERI note server computer in an AD environment. This is because the SIDs that represent these local groups are of validity only on that particular IDERI note server computer and become meaningless if you ever decide to move your IDERI note databases to another computer.
Active Directory® distribution lists (DLs) cannot be used as message recipients, because DLs are never part of a user token, which is the data structure that identifies a user and contains group membership information. However, this should not be particularly surprising, as for the exact same reason, other resources in an AD, like files, shares, registry keys, etc. can also not be secured using DLs. Limited support for Active Directory® distribution lists is planned for one of the next releases of IDERI note.
An astute reader might now come up with the question, where the other users and groups that are listed in the security page come from. Before we answer this question in the next section, we will now watch what happens if Albert.Tross now logs into the workstation Client01. Soon after the user’s login, the message we just created will be pulled from the server, and a screen like in figure 4.10 will be shown on the desktop of Albert.Tross.
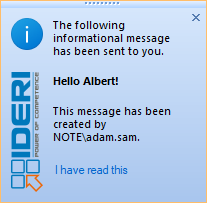
Fig. 4.10 The message as shown on the desktop of Albert.Tross
Note that the message creator “note\adam.sam” is shown in the message window as well, so users will always know who created or last modified a message they receive.
If we now look again at the workstation Admin01, where we just created the message, and hit F5 in IDERI note administrator, the program will refresh its views and we will immediately see in the lower pane view, that the IDERI note client on Client01, where Albert.Tross is logged on, has sent back the notification that the message has been received. Figure 4.11 shows a single line in the lower pane view with the letter symbol, along with the workstation and user name and the time when the message was received on the client, and when the notification was received on the server.
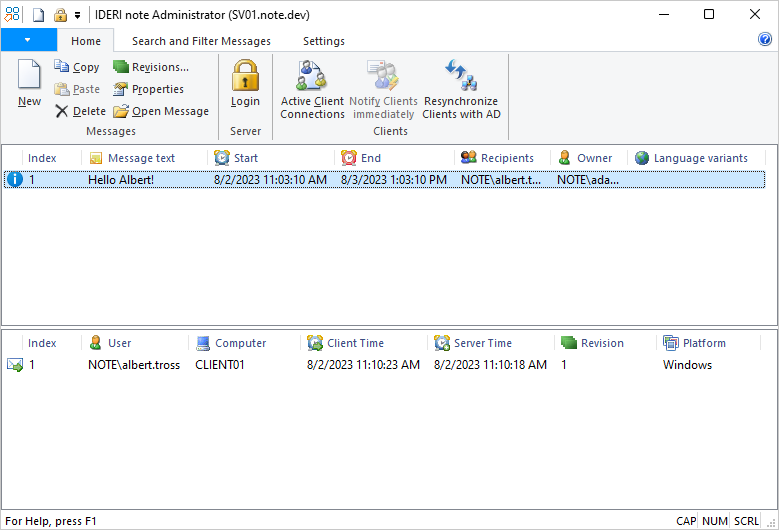
Fig. 4.11 Message has been received by the client
If you look closely at the times, when the message was received on the client and when the notification was sent back to the server, you will notice, that apparently the notification was sent before the message was received. However, the explanation for this conundrum can easily be given: The client receive time is the time on the client when the client receives the message. So it is derived from the clock chip of the client computer. After having received the message, the client sends back this time stamp to the server which will look up its own time, derived from its own clock chip. So what we see here is the clock skew between two computers. The two times that are associated with a receive notification should however be always very close together.
Now let’s assume that Albert.Tross, who has just noticed the message on his desktop, clicks the link on the message window that is labeled “I have read this”. The immediate effect for Albert.Tross will be, that the message will just disappear from his desktop. The IDERI note client however, that runs on the desktop of Albert.Tross will reconnect to the IDERI note server after the polling interval has elapsed that was specified during client installation. Now the client will not only pull new messages for Albert.Tross, if available, from the IDERI note server.
It will also send back all acknowledgment notifications. So if we now turn back to the administrative workstation where the IDERI note administrator is running and wait a few minutes, we can hit F5 to refresh the views. We will then see the acknowledgment notification like in figure 4.12.
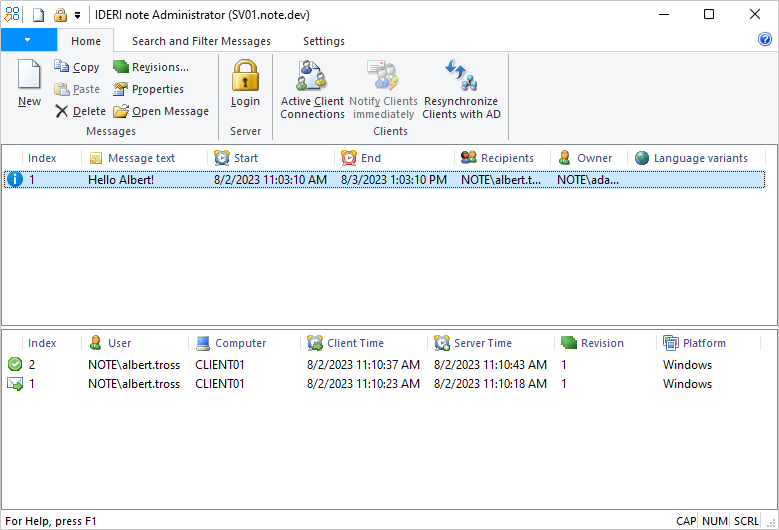
Fig. 4.12 Message has been acknowledged by the client
Like the reception notification, the acknowledgment notification also has a “client time” and a “server time”. Again, the client time is derived from the client computer’s clock chip. However, this time the “client time” is the time, when the user clicks the link labeled “I have read this” on the message window. The server time is the time derived from the server’s clock chip, when the client resynchronizes with its server and sends its acknowledgement notifications.