


4.10. Reactivating messages
Throughout this chapter we always changed existing messages by selecting the message, performing a double click on it and changing the message at our heart’s content in the message dialog. However, there is also an alternative way of changing messages using the message reactivation wizard. This wizard was designed with the assumption in mind, that existing messages that have been used in the past might be reused again in the future with only few elements of the message changed, most notably the start and end time. In order to start this wizard, select a message and perform a right mouse click. From the context menu that appears now, select “Reactivate message”. The start page of the wizard will then appear and looks like in figure 4.40.

Fig. 4.40 Start page of the message reactivation wizard
Note that on Windows® Vista, Windows® Server 2008 and later operating system versions, the wizard pages will look slightly different than on the older Windows® operating system versions, albeit with the same content. On these newer operating system versions, the wizard will use the new AERO wizard design, whereas on the older operating system versions, this wizard will use the Wizard 97 design. If you click the “Next” button on the wizard’s start page, the message start and end time page will appear. This page is shown in figure 4.41.
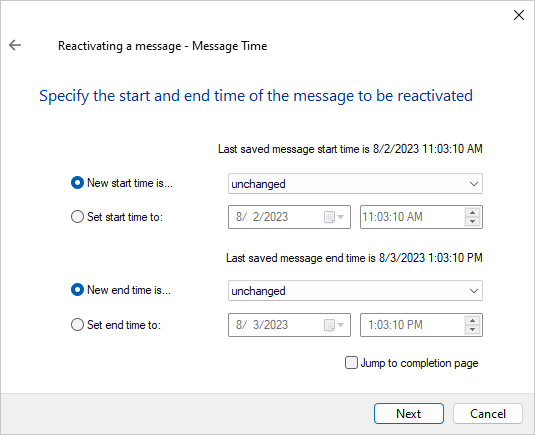
Fig. 4.41 Message start and end time page of the message reactivation wizard
On this page you can specify a new message start and end time. As with all wizard pages of the message reactivation wizard, except for the start page, you can directly jump to the wizard’s completion page by ticking the check box labeled “Jump to completion page” and pressing the “Next” button. If you jump to the completion page this way, all elements of the message that could otherwise be changed on the skipped pages, retain their previous values. If you do not tick the check box labeled “Jump to completion page” and press the “Next” button, the message recipients page will be shown as in figure 4.42.
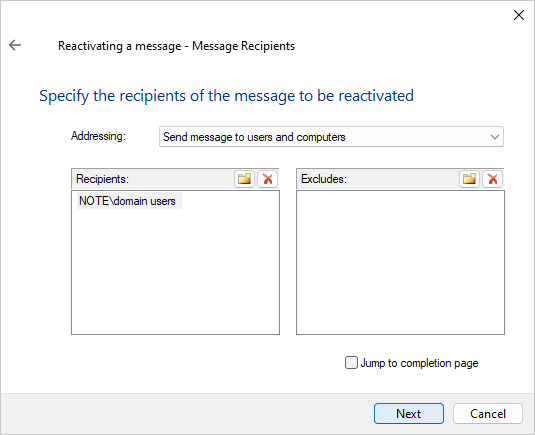
Fig. 4.42 Message recipients page of the message reactivation wizard
This wizard page contains two list boxes with the recipients and the excluded principals for the message already prepopulated. You can now add or remove new recipients and excluded principals for the message to be reactivated. As with the previous wizard page, you can directly jump to the wizard’s completion page by ticking the check box labeled “Jump to completion page” and pressing the “Next” button. If you do not tick the check box labeled “Jump to completion page” and press the “Next” button, the message options page will be shown as in figure 4.43.

Fig. 4.43 Message options page of the message reactivation wizard
On this page you can change the message attributes as described in section 4.9. As with the previous wizard page, you can directly jump to the wizard’s completion page by ticking the check box labeled “Jump to completion page” and pressing the “Next” button. If you do not tick the check box labeled “Jump to completion page” and press the “Next” button, the network ranges page will be shown as in figure 4.44.
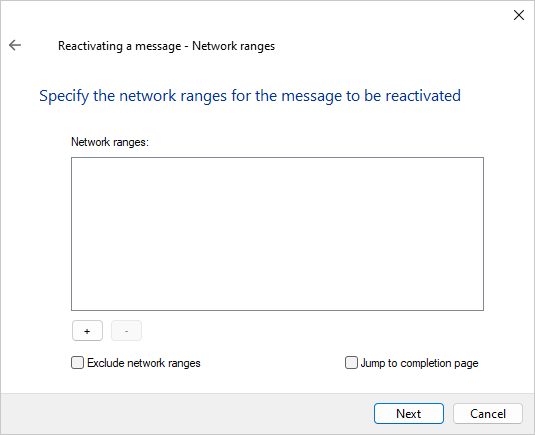
Fig. 4.44 Message network ranges page of the message reactivation wizard
On this page you can optionally select one or more network ranges to filter the recipients of the message as described in section 4.15. As with the previous wizard page, you can directly jump to the wizard’s completion page by ticking the check box labeled “Jump to completion page” and pressing the “Next” button. If you do not tick the check box labeled “Jump to completion page” and press the “Next” button, the message text and importance page will be shown as in figure 4.45.
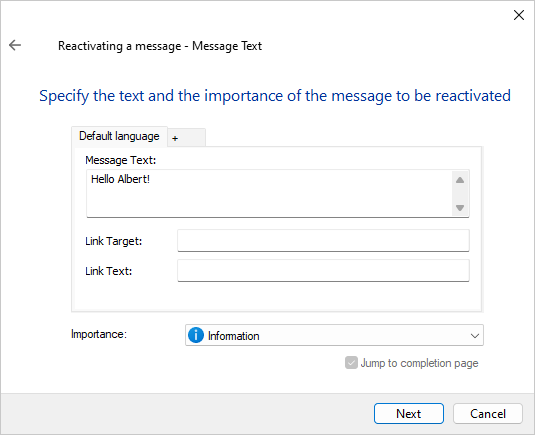
Fig. 4.45 Message text and importance page of the message reactivation wizard
This page contains a text field with the current message text and a combo box with the current message importance. After having made your changes, press the “Next” button in order to jump to the completion page of the wizard as in figure 4.46.
Fig. 4.46 Completion page of the message reactivation wizard
In order to reactivate the message with the changes you just made, click the “Finish” button on this page now and a new revision of the message will then be created.
Attention
Copying messages
Note that instead of running this wizard in order to reactivate an existing message, you can also create a new message as an exact copy of an existing message. In order to do so, select the existing message and select the “Copy” button from the “Home” panel of the ribbon’s “Messages” tab. Then select the “Paste” button and the message creation dialog will appear with all fields populated with the values of the existing message. You can then change those fields that should be different for the new message and click the OK button. Note, however, that using this technique will create a brand new message instead of a new revision of an existing message as is done with the message reactivation wizard.