


6.1. The IDERI note web UI
In order to use IDERI note web UI, lauch an internet browser and connect to
http://<server>:<port>/IDERInote (in our example this is
http://SV01.note.dev/IDERInote).
You will be prompted for your domain credentials using
basic authentication (figure 6.1).
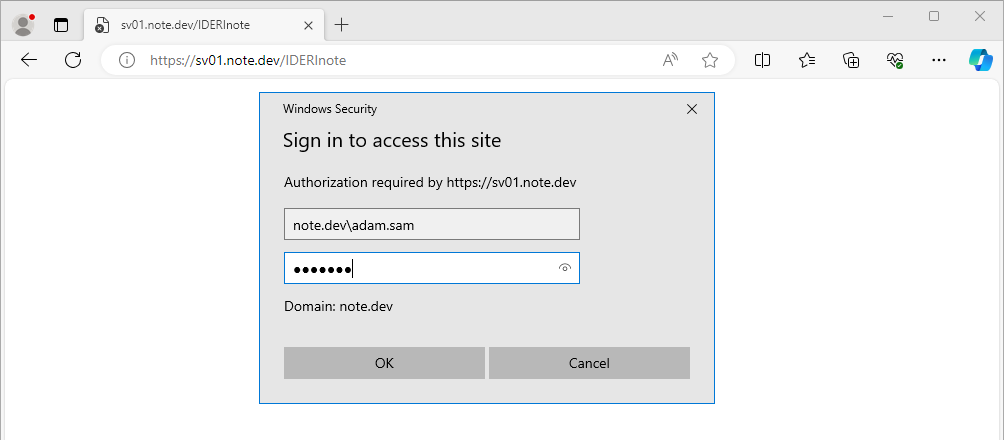
Fig. 6.1 IDERI note web UI basic authentication prompt
After a successful sign-in, the IDERI note web UI (figure 6.2) overview page will be shown.
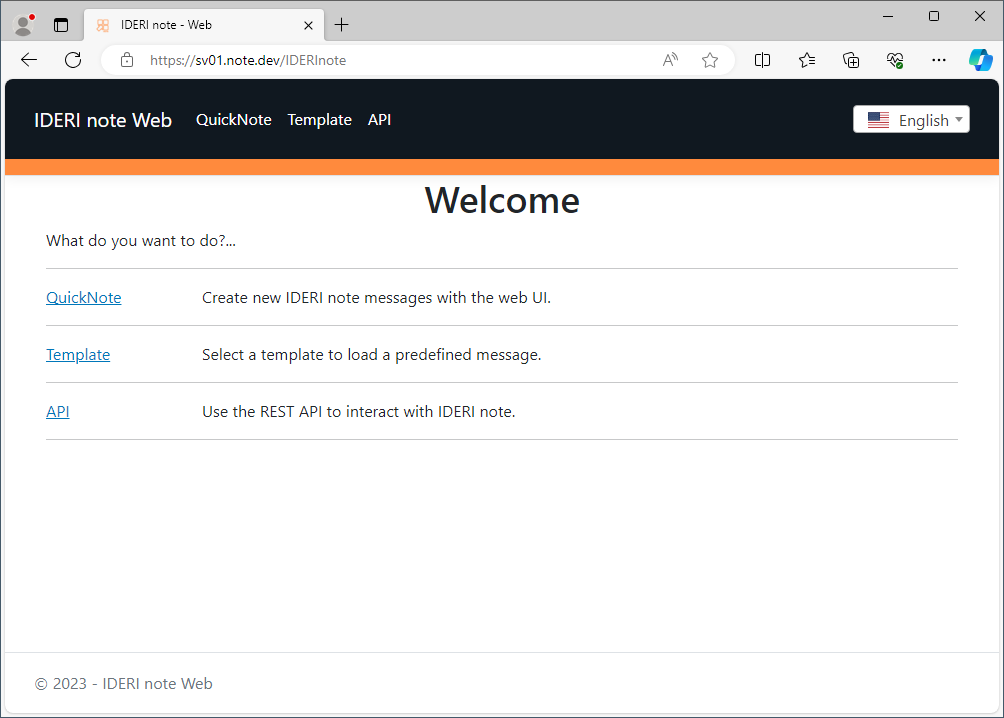
Fig. 6.2 IDERI note web UI overview page
On this page, you can select whether you want to continue with IDERI note web QuickNote, the IDERI note web Template selector or the IDERI note API.
6.1.1. QuickNote
IDERI note web QuickNote is a web based UI that enables you to create new IDERI note messages on your IDERI note server from almost any device with a modern internet browser.
6.1.1.1. Working with QuickNote
IDERI note web QuickNote offers all message creation settings otherwise known from IDERI note Administrator. For this purpose, IDERI note web QuickNote separates message properties into tabs. Common message properties such as the message text, priority, message duration, recipients, etc. are shown on the Common tab (figure 6.3) whereas settings such as the various message display options or the notification options are located in the Settings tab (see figure 6.4).
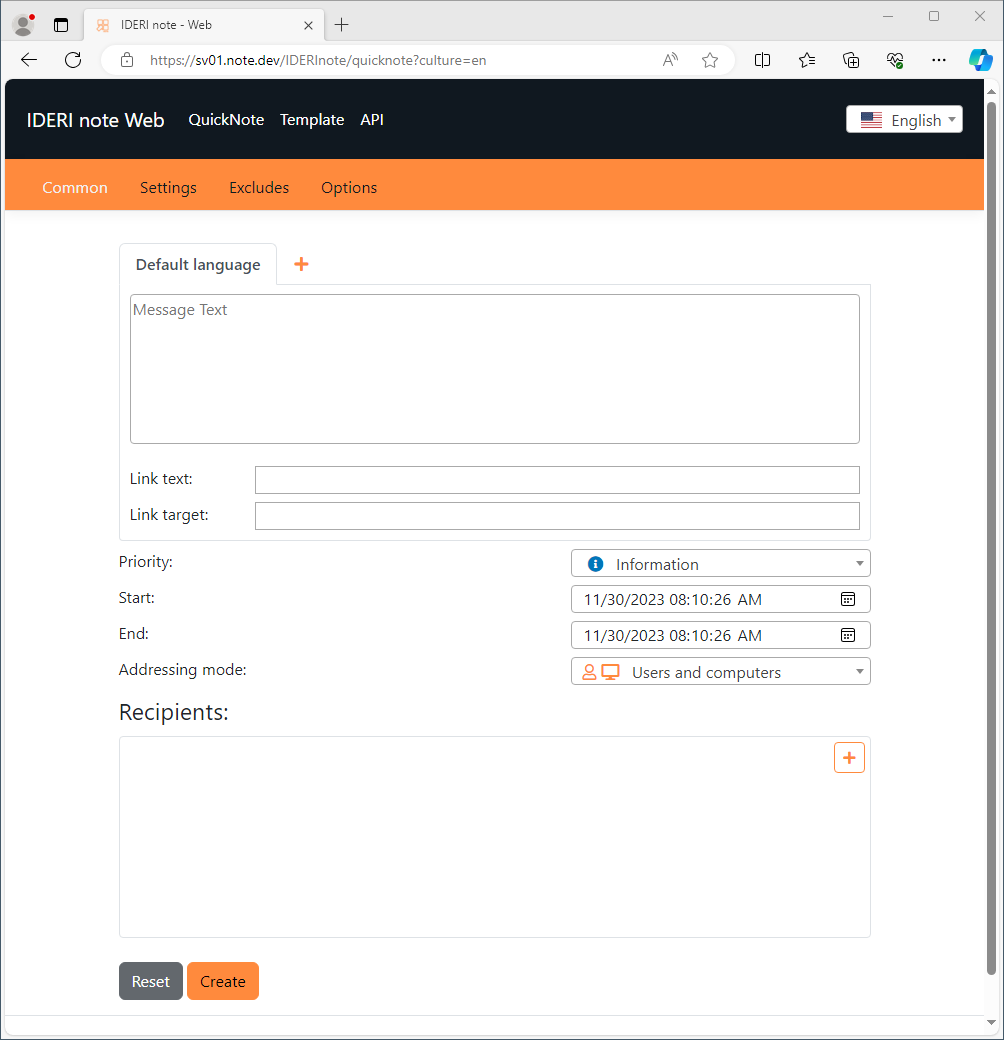
Fig. 6.3 QuickNote common message properties tab
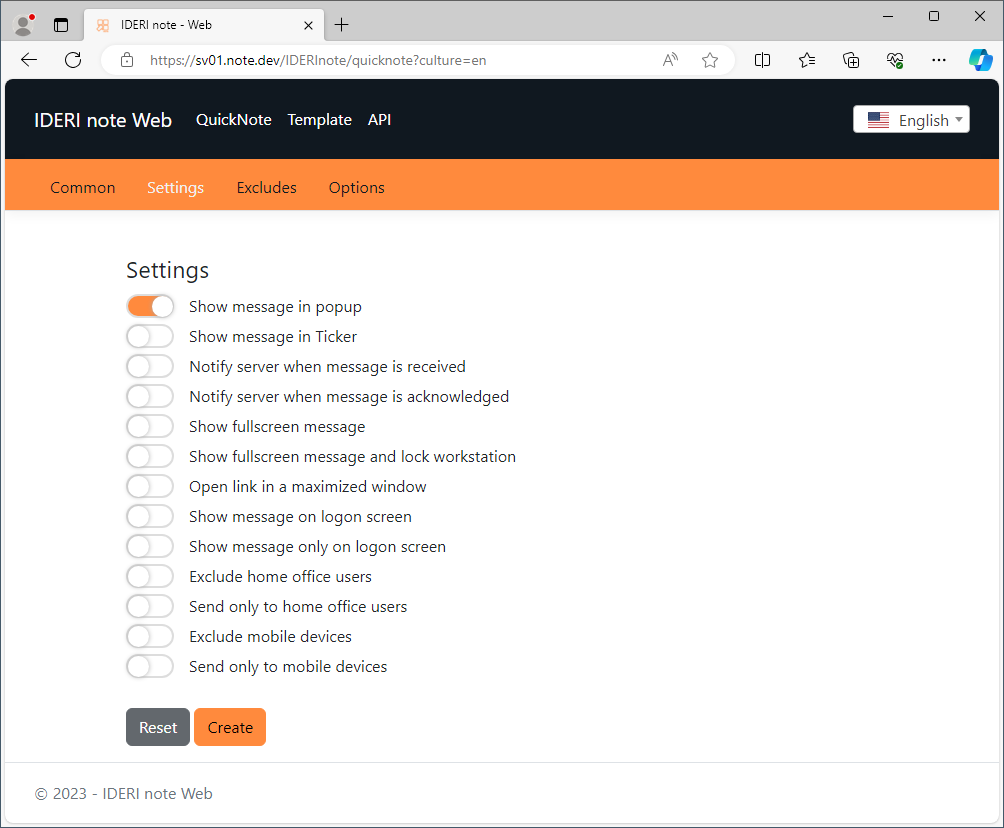
Fig. 6.4 QuickNote settings tab
In order to add new recipients or excludes click the plus sign (“+”) as shown in figure 6.3. A new dialog will now be shown as in figure 6.5.
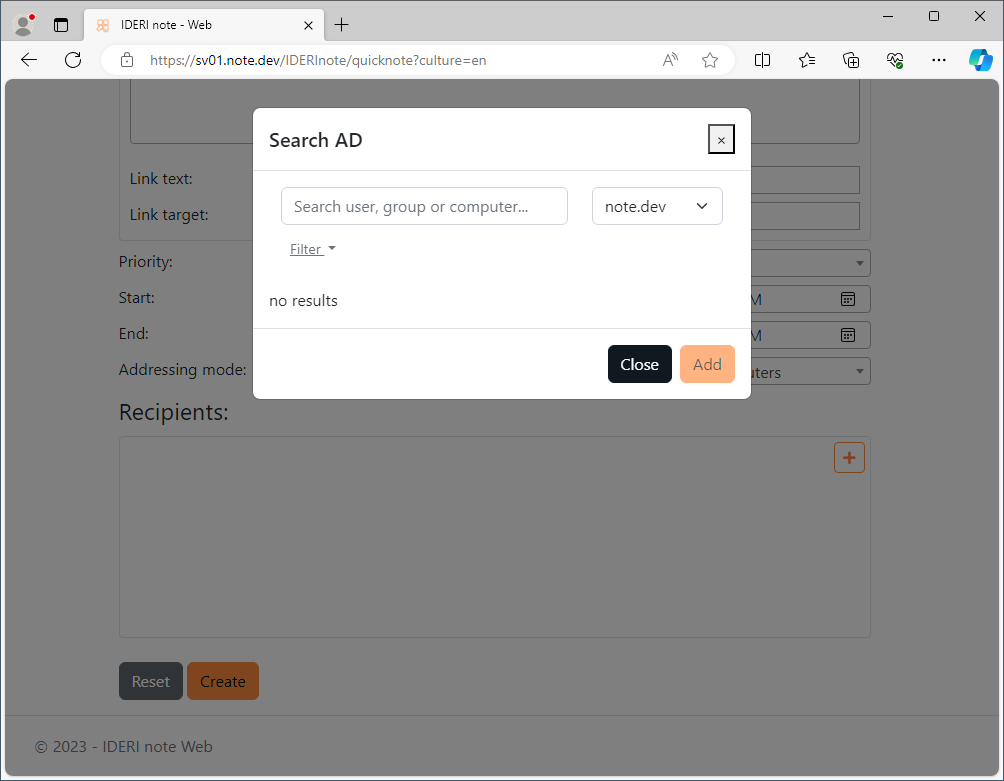
Fig. 6.5 Active Directory® search dialog
If there are trusts between several domains, you can select the domain you want to browse using the dropdown next to the search field as shown in figure 6.6.
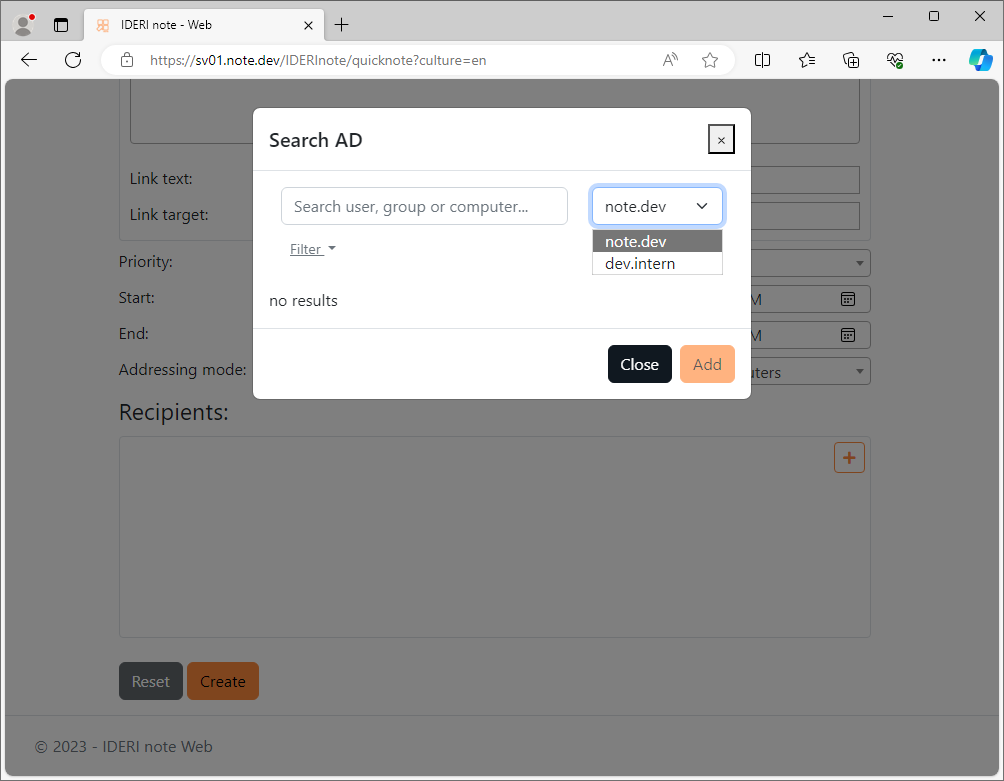
Fig. 6.6 Domain selection in the Active Directory® search dialog
As the next step, you can start searching for Active Directory® principals simply by typing the name of an Active Directory® user, computer or well-known principal in the search box. Using the asterisk (“*”) wildcard sign can simplify your selection, as shown in figure 6.7. In order for the search mechanism to work, you have to type at least 3 characters. Check or uncheck the checkboxes under Filter if you want to narrow down your search results further.
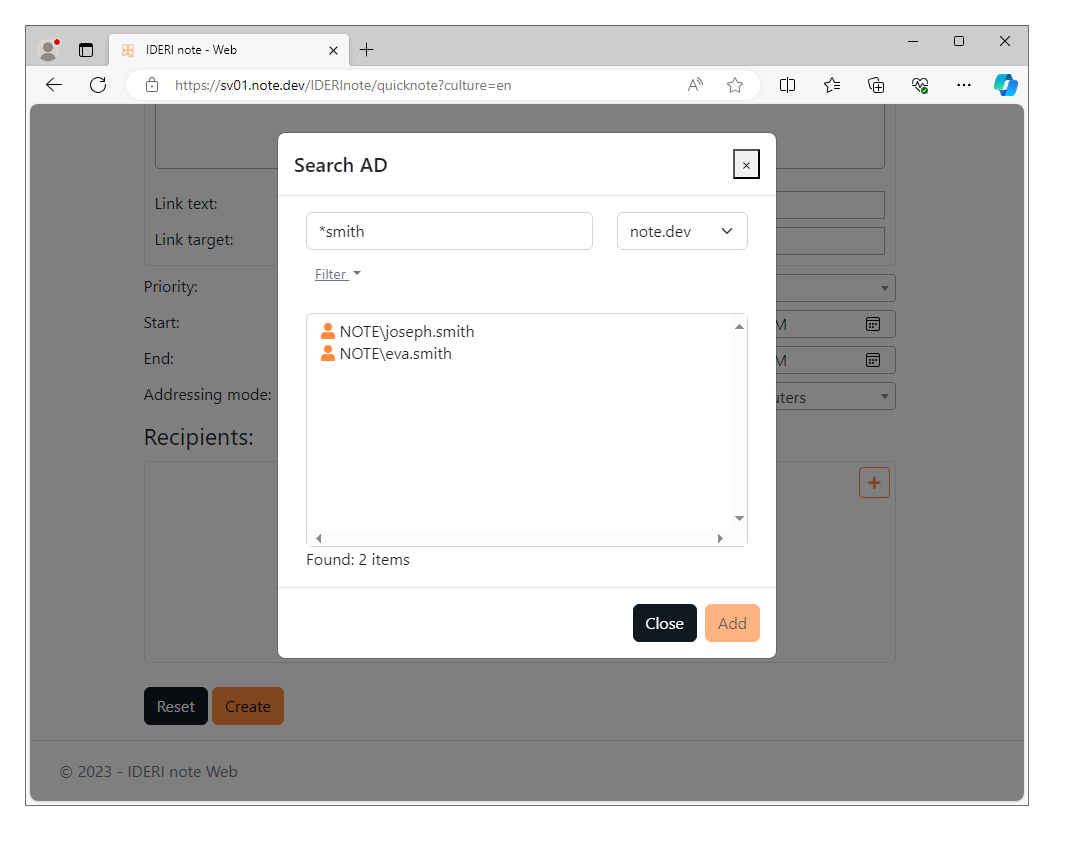
Fig. 6.7 Active Directory® wildcard search
Adding a single principal to the recipients or excludes list is now easily accomplished with a double click on one of the suggested entries. Multiple principals can be added by selecting multiple entries from the list of suggestions followed by a click on the Add button (see figure 6.8).
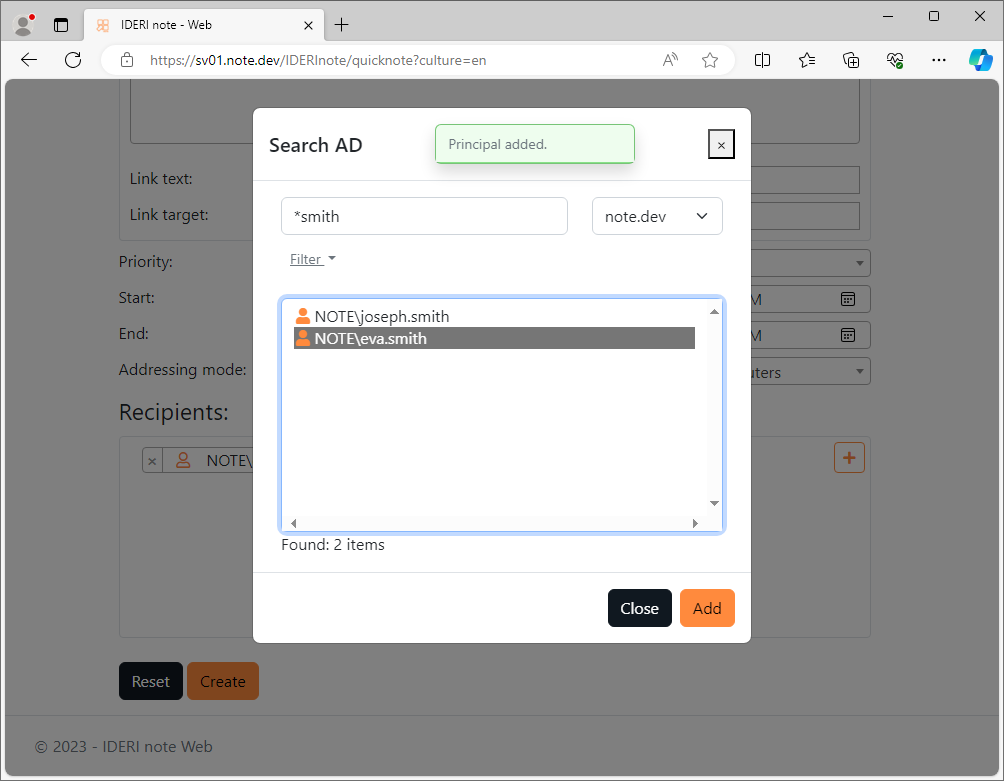
Fig. 6.8 Adding multiple principals
When you are done adding principals, close the dialog using the Close button and observe that the list of recipients or excludes will be populated with your selection of principals (see figure 6.9).
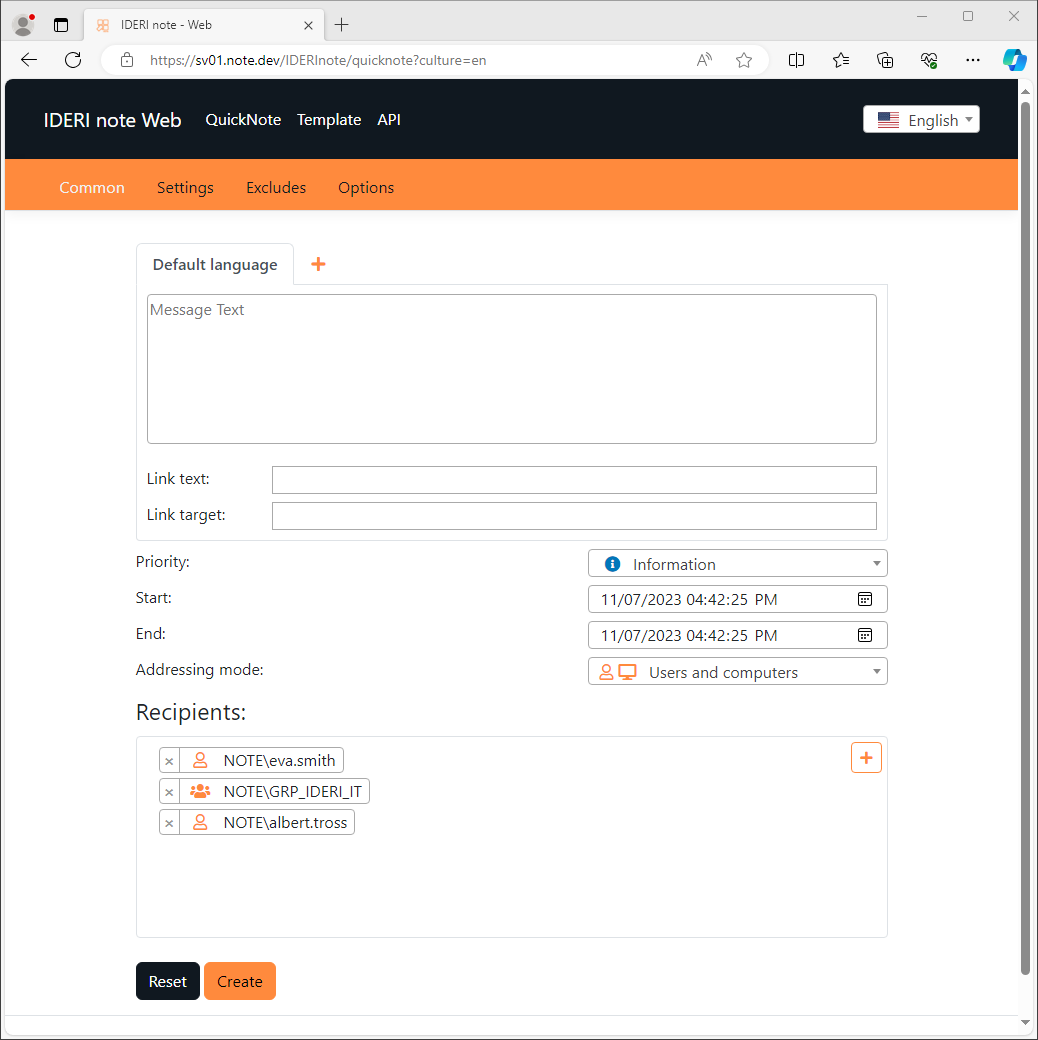
Fig. 6.9 Populated recipients list
To remove an entry from the list you can do so by clicking the “x” symbol next to each entry.
At this point you can continue composing your new message, adding a message text, link text and link target, setting the priority, etc. After you have supplied all necessary settings for the new message, click the Create button at the bottom of the page. If the message can be created successfully, a popup window will appear as in figure 6.10.
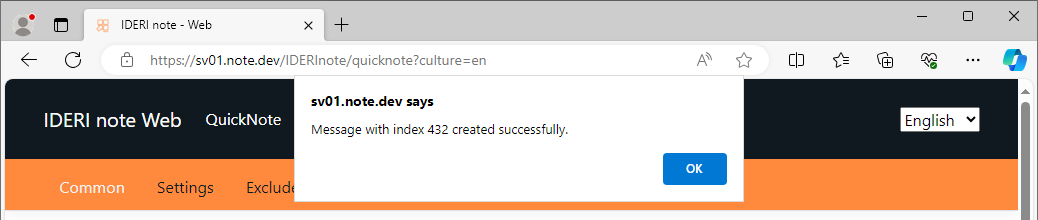
Fig. 6.10 The message has been created successfully
6.1.1.2. Modify defaults of the QuickNote UI
The default settings of the QuickNote UI can be customized to a certain extent.
This is especially useful in situations where users should only be able to
supply a minimum amount of information when creating a new message using the
QuickNote UI. For this purpose, some fields of the QuickNote UI can be
prepopulated with meaningful content or even hidden from the users working with
the QuickNote UI. This is accomplished using a template file describing the
default settings for the QuickNote UI. The name of this file is
“QuickNoteTemplate.json” and it must be placed into the
"%PROGRAMDATA%\IDERI\note\web\QuickNote" directory and it must, as the name
implies, follow JSON notation and syntax.
Note
There is a default template file named QuickNoteTemplate.json.template
that is located in the installation directory of IDERI note web under
<INSTALLFOLDER>\Templates\QuickNote. This file can be used as a starting
point for your own purposes by copying it into the
"%PROGRAMDATA%\IDERI\note\web\QuickNote" directory and renaming the file
name to “QuickNoteTemplate.json”.
As an example, a template suchs as in the code block below could be used in order for the QuickNote UI to be changed to appear as in figure 6.11.
{
    "iNoteMessageTemplate": {
        // Common section
        "Common": {
            "Text": {
                "Value": "This is the new default text for the message..."
            },
            "Priority": {
                "Value": "WARNING"
            },
            "EndTime": {
                "Value": "+02/00/00"
            },
            "AddressingMode": {
                "Value": "UserOnly",
                "ReadOnly": true
            },
            "Recipients": {
                "Value": ["note.dev\\NOTE-W10-01$", "everyone"]
            },
        "LinkText": {
                "Show": false
            },
            "LinkTarget": {
                "Show": false
            }
        },
        // Settings section
        "Settings": {
            "ShowLinkMaximized": {
                "Value": false, //Default: false
                "Show": false,
                "ReadOnly": false
            }
        }
    }
}
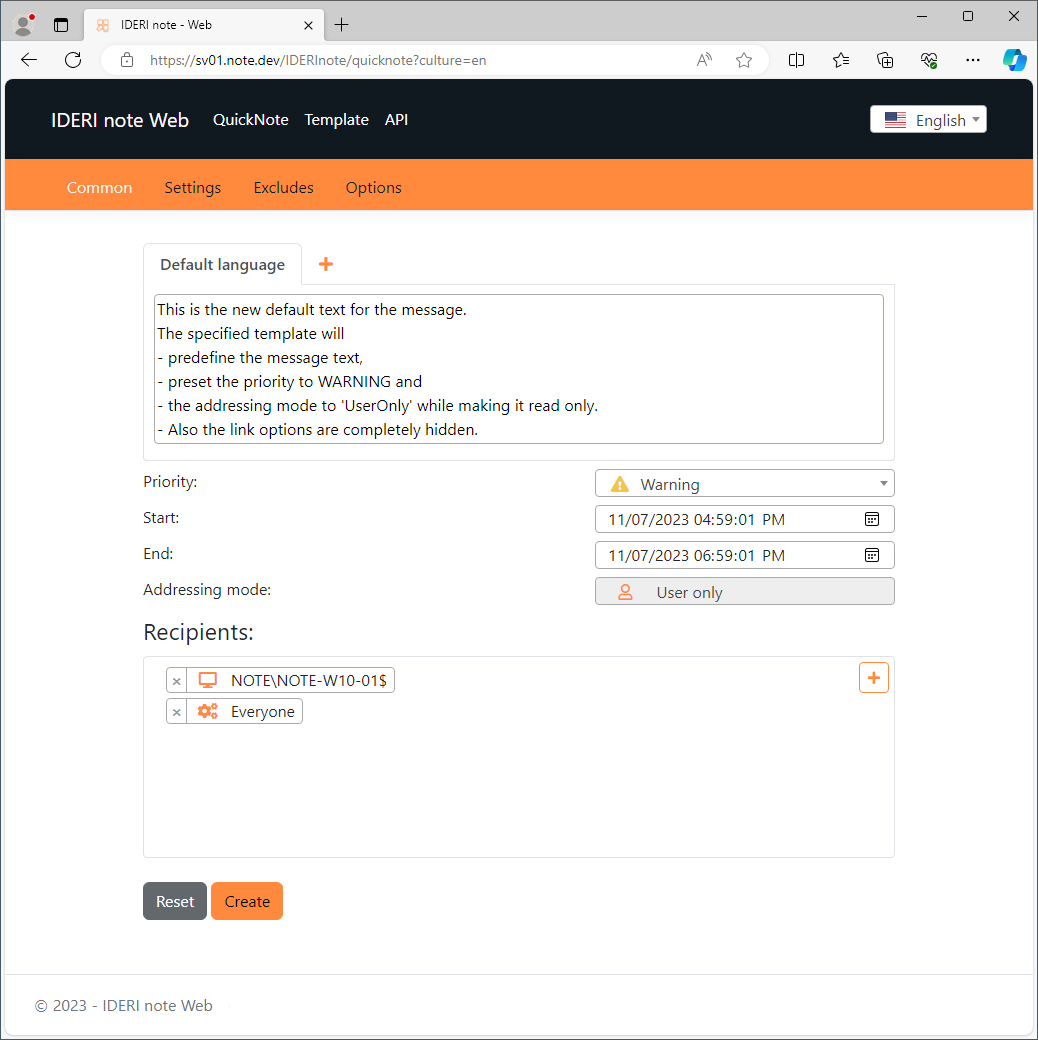
Fig. 6.11 QuickNote UI with a custom defaults template
6.1.2. Template Selector
The Template Selector allows for the selection among multiple templates and have them loaded into QuickNote. Figure 6.12 shows the Template Selector UI with no templates specified yet.
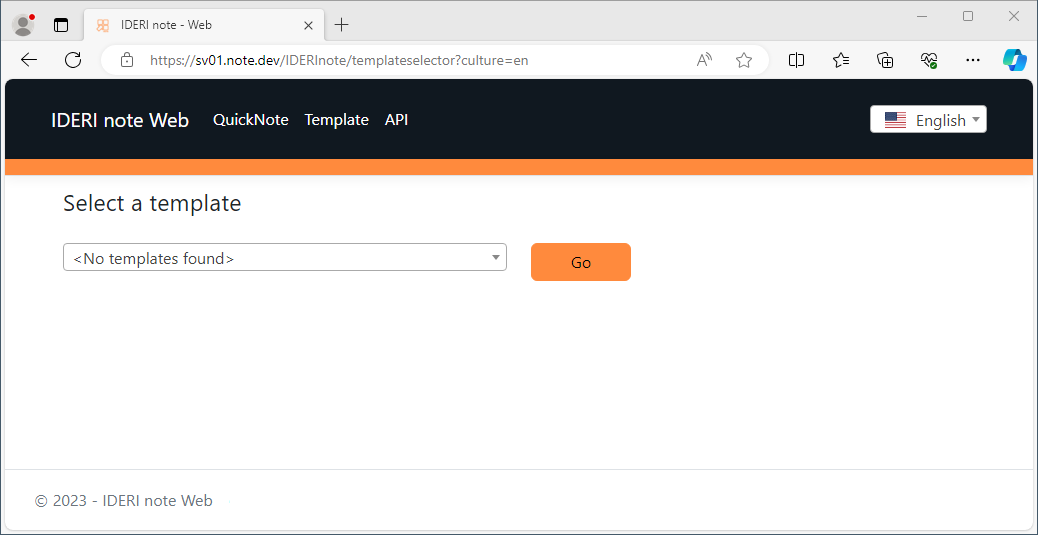
Fig. 6.12 Template Selector UI with no templates specified yet
Note
Templates specified via the Template Selector are available globally to all IDERI note web users regardless of their permissions to create messages using a given template.
6.1.2.1. Creating new templates using Template Selector
In order to fill the list of templates in Template Selector you can create
multiple json template files and place them into the
"%PROGRAMDATA%\IDERI\note\web\TemplateSelector" directory or one of its
subdirectories.
Note
There is a default template file named QuickNoteTemplate.json.template
that is located in the installation directory of IDERI note web under
<INSTALLFOLDER>\Templates\QuickNote. This file can be used as a starting
point for your own purposes by copying it into the aforementioned
directory and renaming the file appropriately.
The name of any such json file does not affect the way the the associated
template is
displayed in Template Selector. In order to achieve this, set
DisplayName and Description properties within the template itself.
If the DisplayName property is missing, the template will not be added to
the list of templates in Template Selector.
As an example, the settings shown in the
code block below will result in
the Template Selector displaying the selected template as in figure 6.13.
{
    "DisplayName": "Server Maintenance",
    "Description": "A template for Server maintenance.",


}
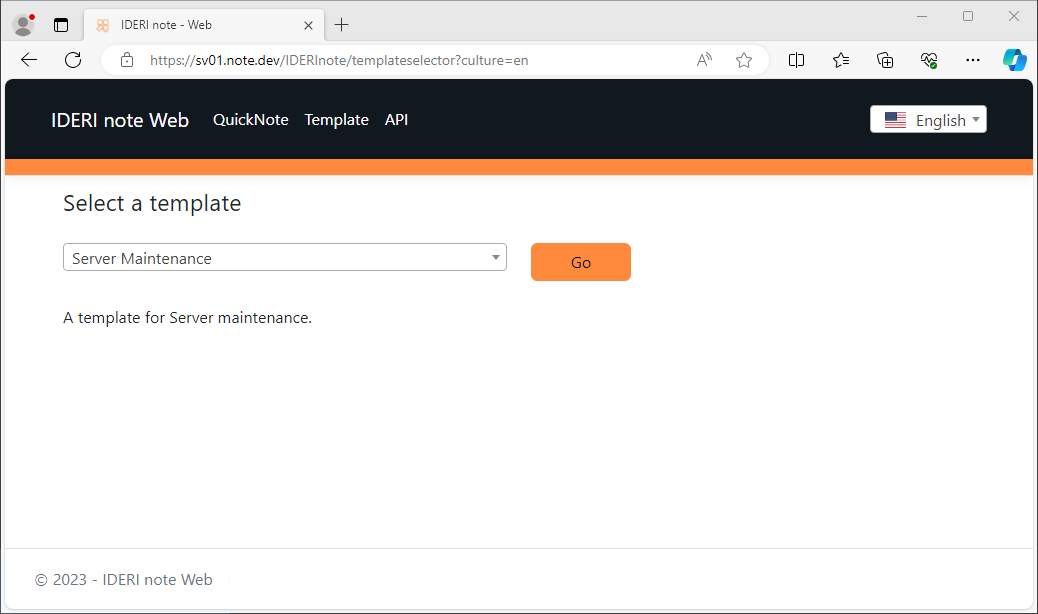
Fig. 6.13 Template Selector UI with a selected template
6.1.2.2. Working with Template Selector
After one or more templates have been specified for Template Selector, users can choose among the templates as in figure 6.14 and click the Go button as in figure 6.15 to load the selected template.
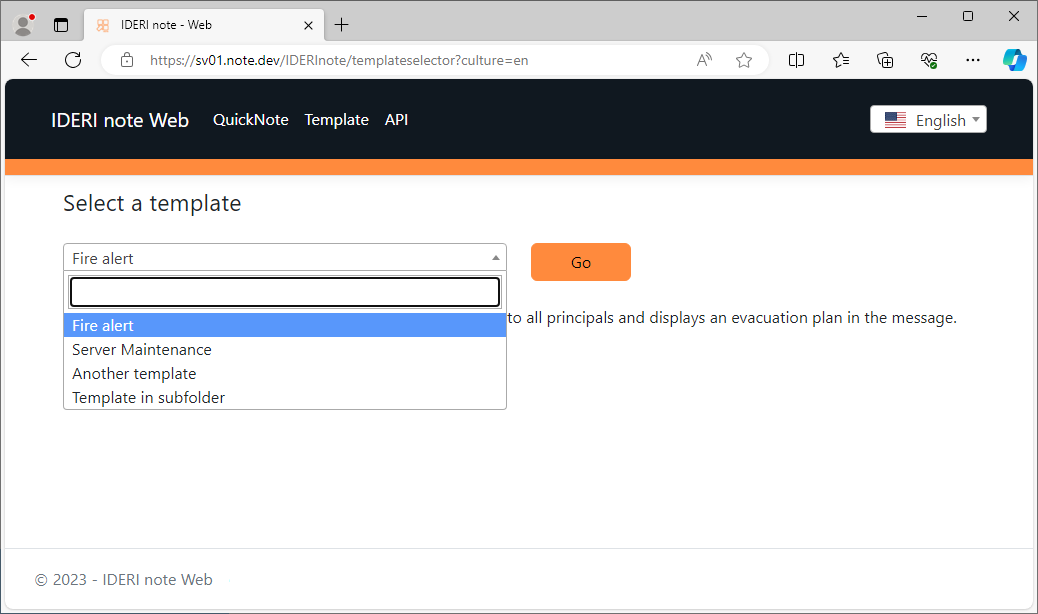
Fig. 6.14 Selecting a template from the template list in Template Selector

Fig. 6.15 Loading the selected template in Template Selector by clicking the Go button
This will load the selected template into QuickNote as shown in figure 6.16.
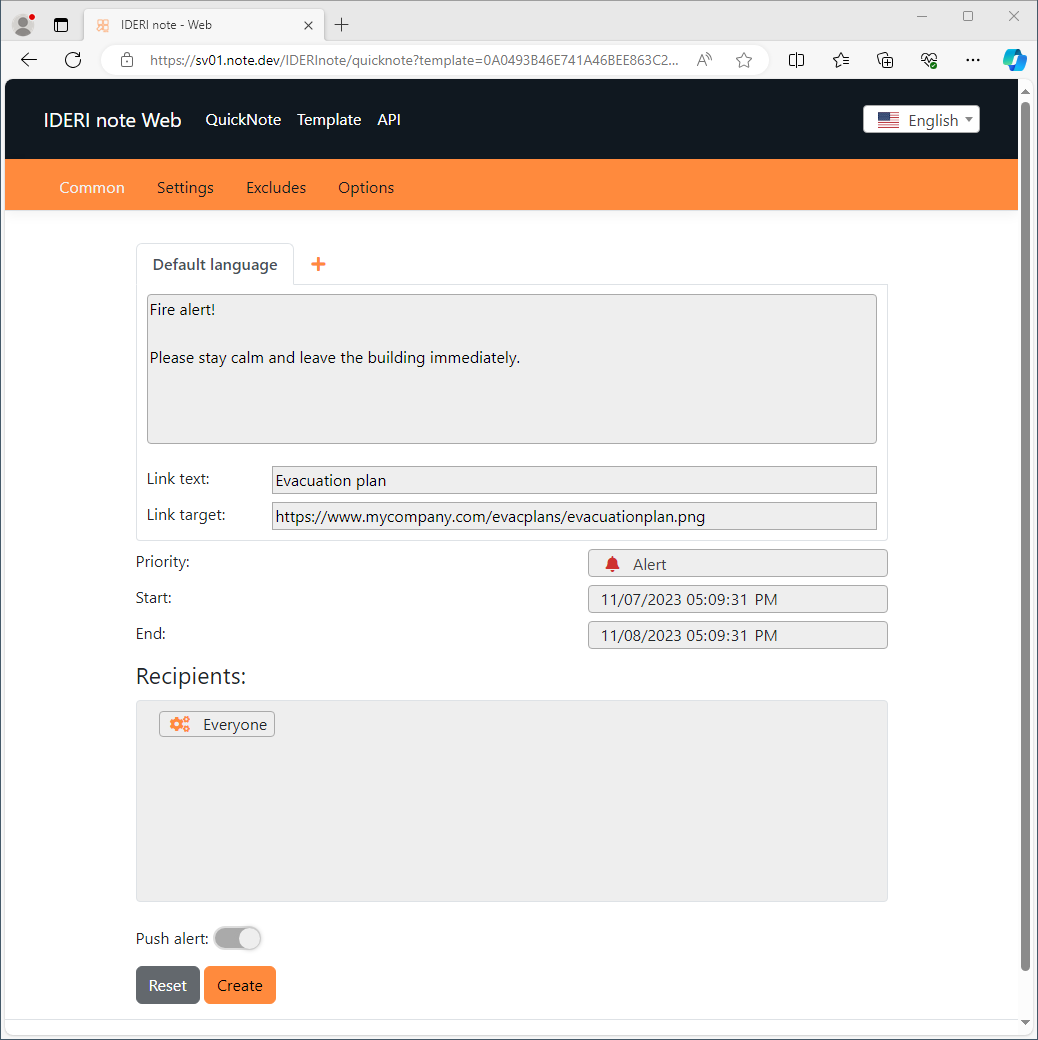
Fig. 6.16 Template loaded into QuickNote
Any fields within the template that are not marked as read only or hidden can now still be modified by the users prior to the creation of the message. The creation of the message can be completed by clicking the Create button
Note
Each template has a unique ID you can use to create shortcuts and load the specific template
directly. This ID is generated from a one-way hash of the template’s file path
and can be specified using the query
parameter ?template= within the URL (see figure 6.17).

Fig. 6.17 Query parameter to load a specific template
Warning
Changing the path or the file name of an existing template file will result in a new hash for the template and will therefore invalidate any previous links users might have used before.
6.1.3. Administrator
Starting from version 3.11, IDERI note web includes some functionalities that were previously only available through the IDERI note administrator. For instance, existing messages can now be listed and updated in web, network ranges can be created or edited, message statistics can be accessed, and acknowledgements can be read.
Note
Scope of functions of the IDERI note web administrator
The IDERI note web administrator currently does not offer all the functionalities available in the IDERI note administrator. However, the IDERI note web administrator is planned to be expanded with additional functionalities in the future
To access the IDERI note web administrator page, navigate to the URL
http://<server>:<port>/IDERInote/administrator (in this example
http://SV01.note.dev/IDERInote/administrator). You will be prompted for your
domain credentials (figure 6.18), unless you are already
logged in.
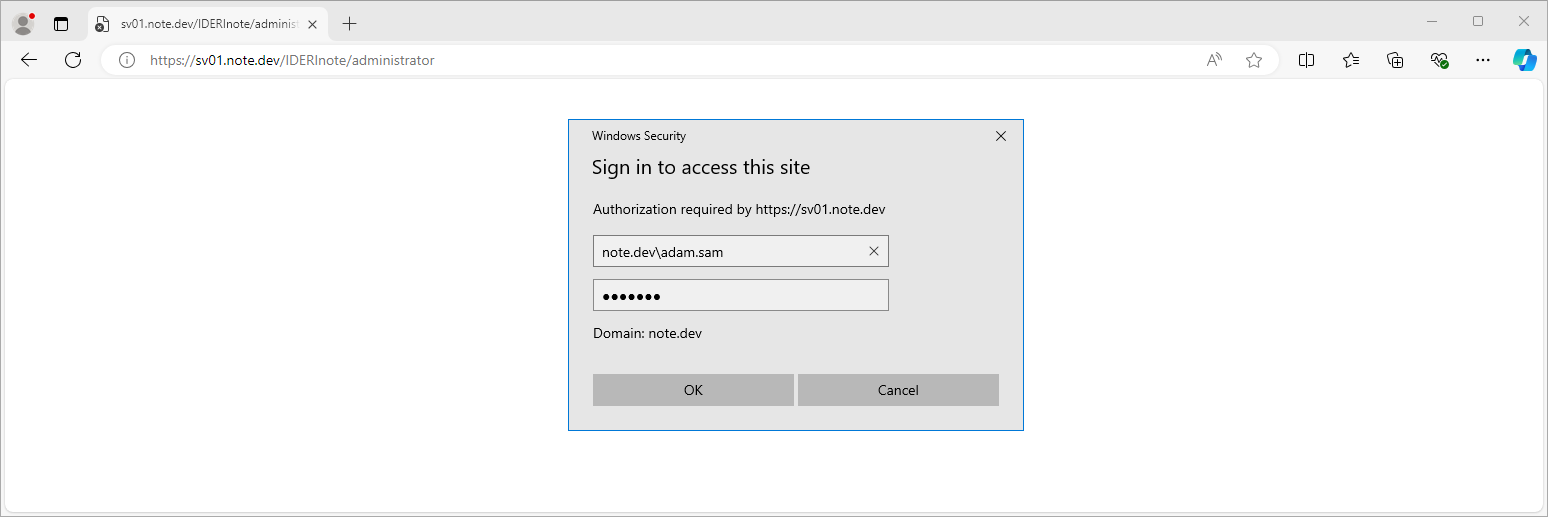
Fig. 6.18 Authentication prompt for IDERI note web Administrator
After successfully logging in, you will be taken to the message overview of the existing messages (Figure 6.19).
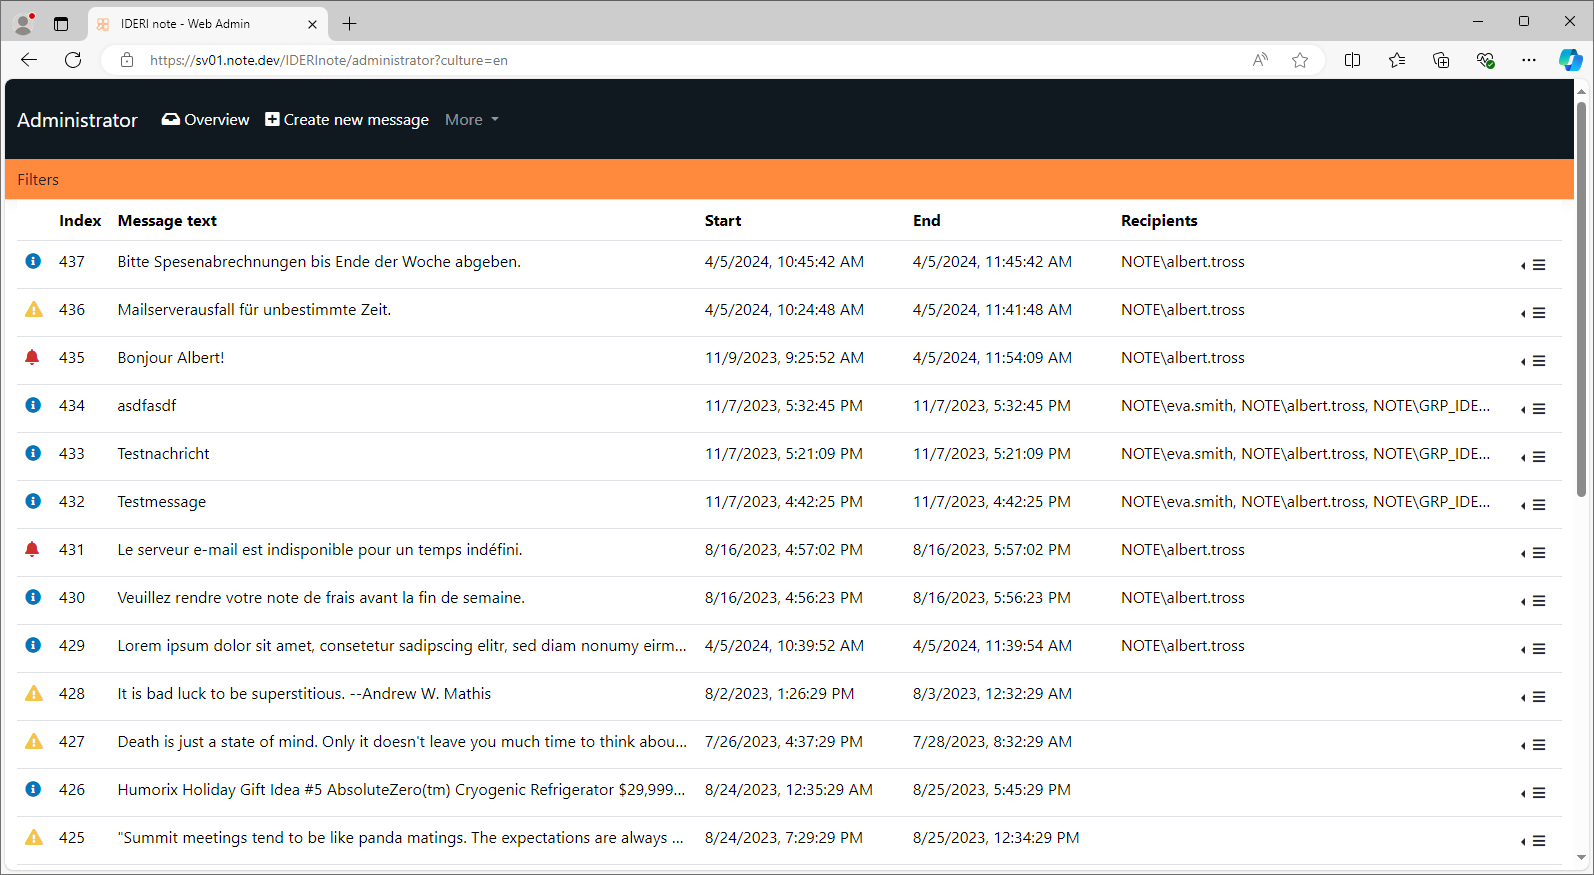
Fig. 6.19 Message overview of IDERI note web Administrator
The hamburger menu at the end of each message row offers you additional options for the message. (Figure 6.20).

Fig. 6.20 Contextmenu for each message in the IDERI note web Administrator
By selecting the More option in the main menu, you can access additional configuration and information pages that you are already familiar with from the IDERI note administrator. (Figure 6.21).
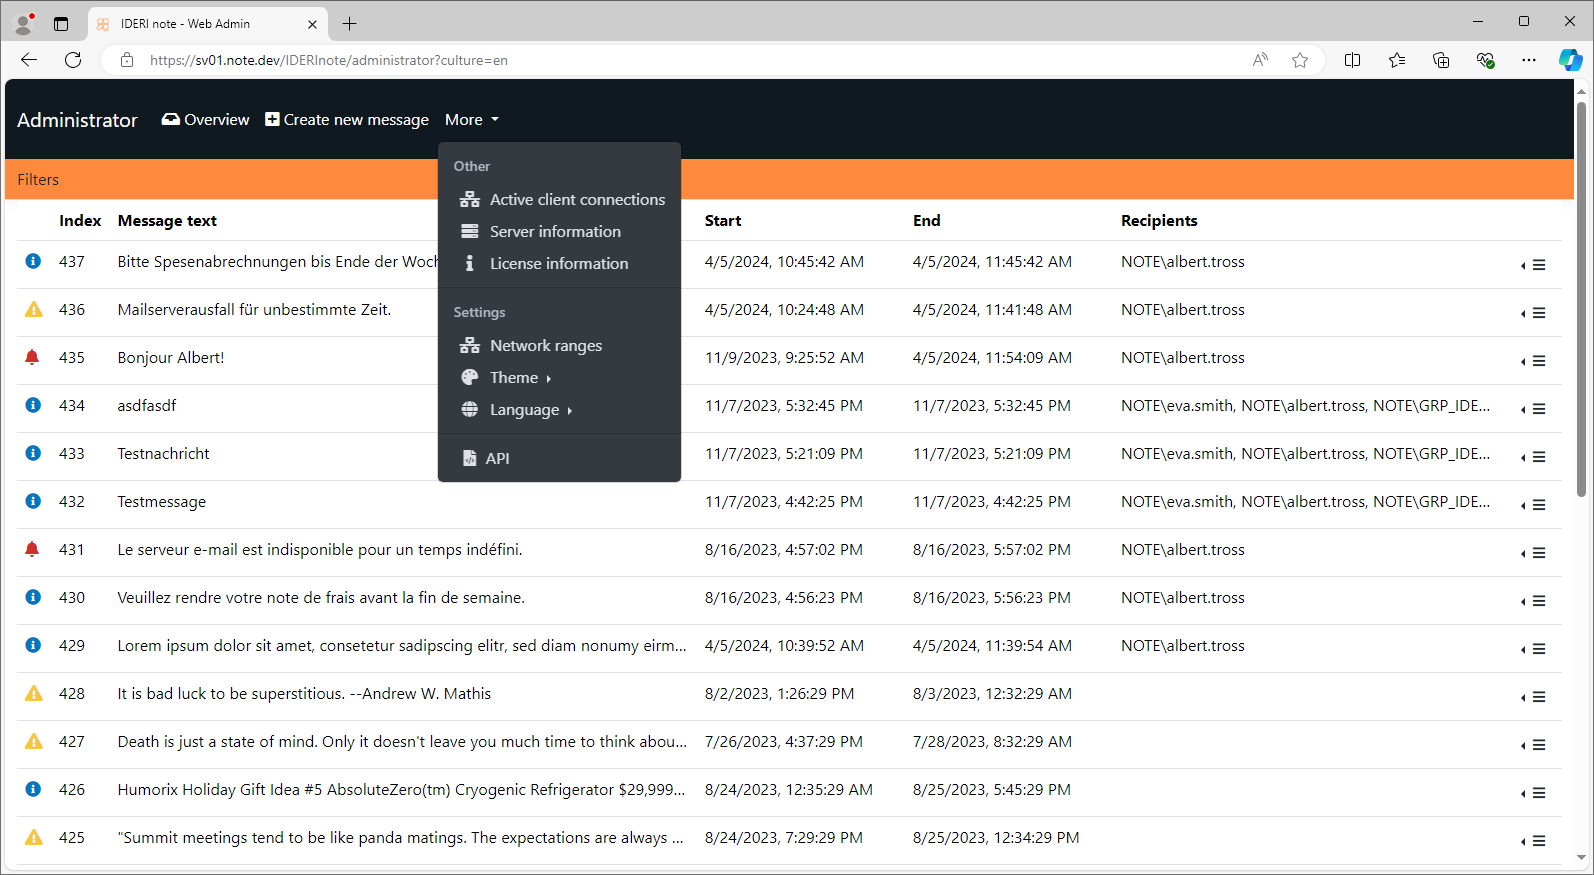
Fig. 6.21 More settings pages in IDERI note web Administrator